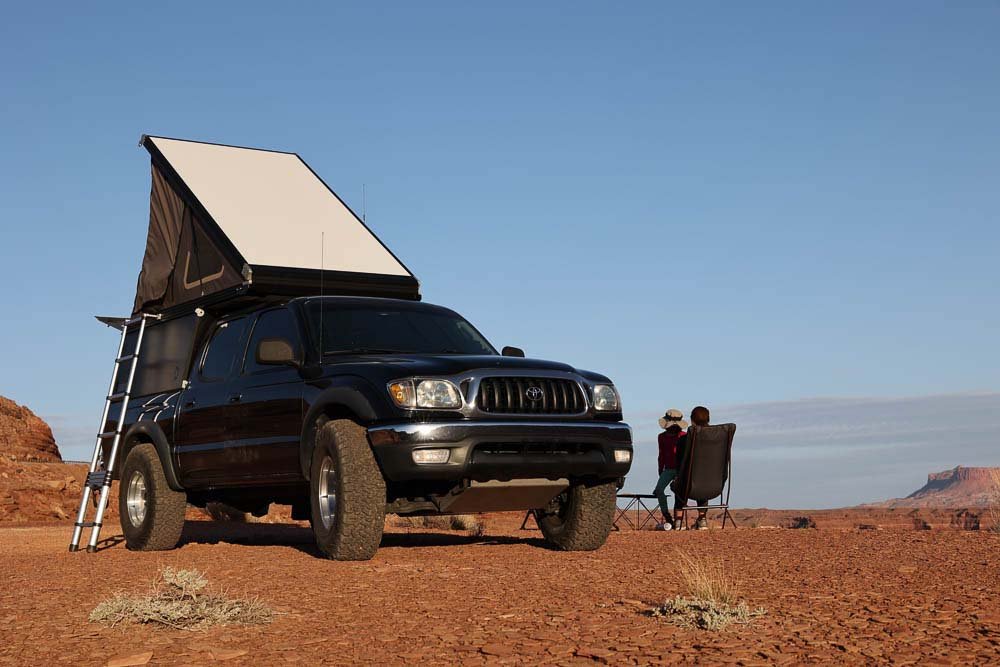
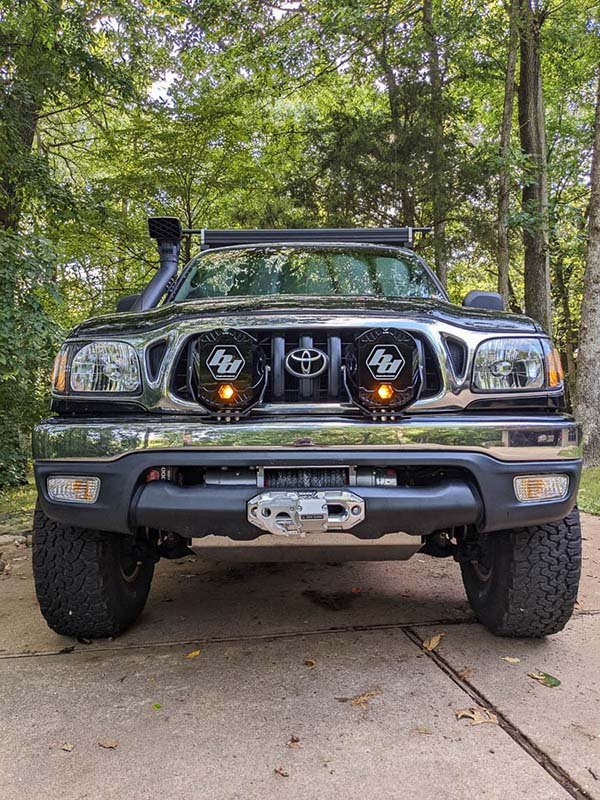
Toyota Tacoma Overland Build
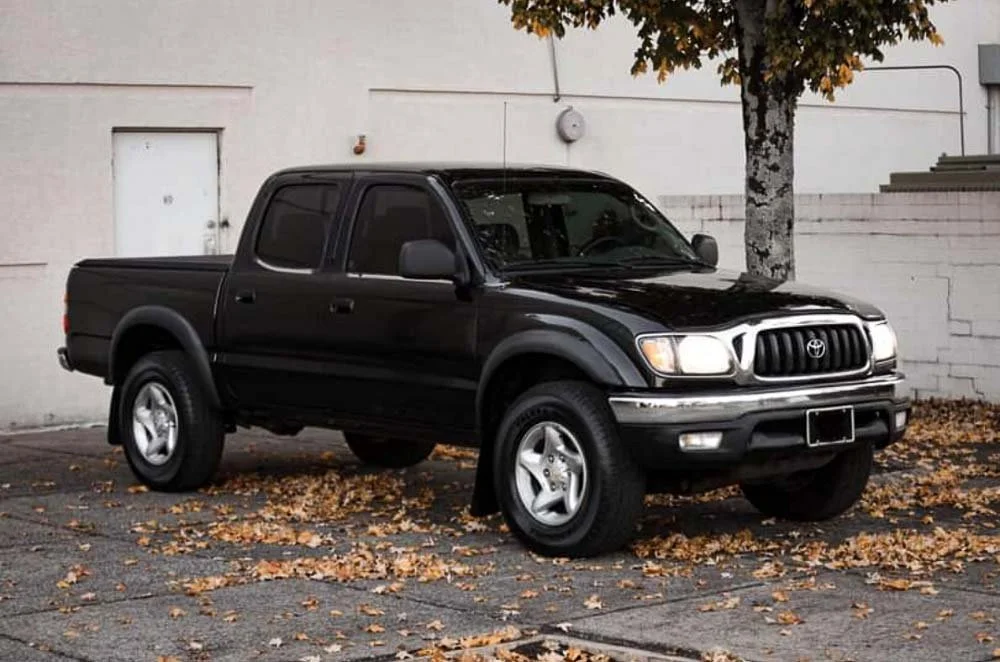

This overview of our Toyota Tacoma overland build is a bit of a departure from our typical posts and, while everyone’s personal overland vehicle build process looks different depending on their needs, it’s our hope that this record of our trucks evolution - from a completely stock Tacoma to fully kitted overland travel rig - can serve as a reference for others who are curious about what goes into building an overland truck.
Why We Needed to Build a New Overland Truck
With the addition of our second child on the horizon, Lindsey and I had to come to terms with the fact that we'd officially outgrown our, admittedly always-a-bit-cramped, 1984 Toyota Pickup budget overland truck that had seen our family through 6 years of adventures together.
The transition process to a more roomy, yet (hopefully) equally capable overland truck wasn't going to be easy for me, having a near life-long love affair with classic Toyotas and a good bit of hesitance around traveling at length with a more modern and mechanically complex vehicle (despite their creature comforts, like cup holders 😅). But nevertheless, we began the process of choosing a new overland truck - onward and upward!
Why A Tacoma Overland Build
After considering a variety of Budget-Friendly Used Overland Vehicles, we whittled the choice down to either an Access Cab 1st Gen Toyota Tundra with its venerable 4.7L V8 or a Double Cab 1st Gen Tacoma with the equally reliable 3.4L V6. Ultimately, the Tacoma's mini-truck-esque form factor, better overall fuel economy, and non-interference engine design won out. And the hunt for an acceptable first generation Tacoma to build into our family overland truck was on!
You can check out our Used Overland Vehicle Buyers Guide and Mechanical Assessment for help with selecting and assessing your own potential overland truck.
For our tacoma overland build, the first criteria was finding a completely stock tacoma (a clean slate to build out the way we saw fit, instead of having to undo or work around someone else’s prior modifications), and preferably a truck with a well documented mechanical history.
Like any other vehicle, the first gen Tacoma has its list of quirks, and frame rust issues were on the top of our go/no-go search criteria. Thankfully the overland gods smiled upon us, and we found and quickly procured a beautifully well-cared-for, completely-stock, never-off-roaded four wheel drive 2004 Double Cab TRD Limited Tacoma with a frame so clean you could practically eat off of it!
Let the overland Tacoma build begin!
Getting Maintenance Up-to-Date
Once home with the new truck, I quickly dove into getting the mechanics up to date. For our Toyota Tacoma overland build, this included:
Fresh Fluids throughout:
Redline Front & Rear Differential Oil
Redline Transfer Case Oil
Redline 5w-30 Engine Oil
Redline D4 Automatic Transmission Fluid
Toyota Coolant
Brake & Power Steering Fluid
Redline Molly Grease throughout the driveline
Replaced the Timing Belt, Tensioner Pulley, Idler Pulley, Front CAM Seals and Front Main Crank Seal
Replaced AC Compressor, Power Steering, and Alternator Belts
New Water Pump & Thermostat
Adjusted the Valves and Replaced Valve Cover Gaskets, Cleaned the Throttle Body and Intake and replaced all associated gaskets
New Toyota Plugs and Plug Wires
Cleaned the MAF (Mass Airflow Sensor) and installed a new Toyota Air Filter
Replaced the Front Wheel Bearings and CV Axles with Toyota factory components (in conjunction with the manual hub components discussed below)
New Slotted Rotors and Ceramic Brake pads
New Radiator
New Upper & Lower Ball Joints
New Inner & Outer Tie-rod Ends, Swaybar End Links, and Steering Rack Bushings
As I worked, I found little signs at every turn of past maintenance, previously replaced non-stock parts or aftermarket gaskets - all signs that she’d seen her share of TLC from the previous owner. Once the truck’s mechanics were fully up-to-date, it was time to move on to the fun stuff!
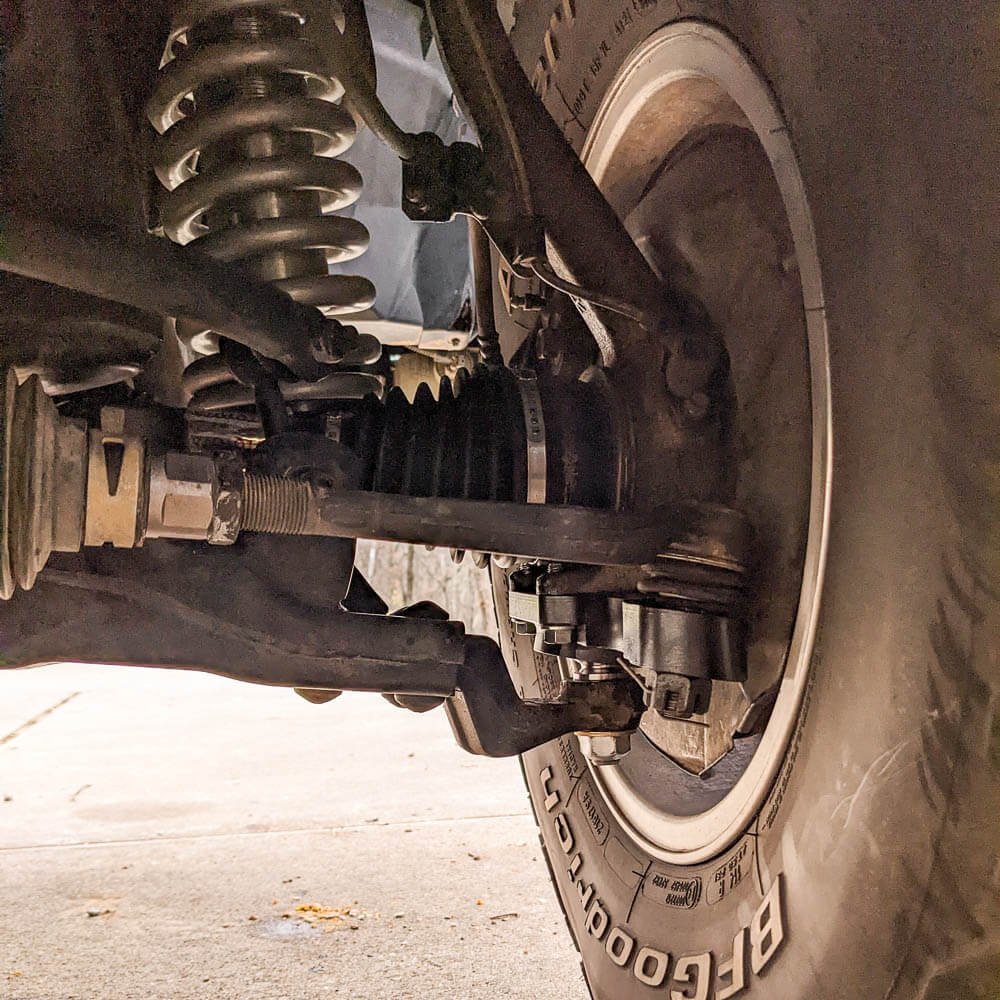
Toyota Tacoma Manual Locking Hub Conversion
Most modern 4x4 vehicles utilize automatic locking front hubs, allowing you to transition from 2WD to 4WD without getting out and manually engaging the front hubs. While this is convenient, it also means that the front CV axles are always engaged and rotating - even when in 2WD. Manual locking hubs, on the other hand, disengage the axles from the front wheels allowing the wheels to turn freely from the axles when not manually “locked.”
Since we were replacing the CV axles and wheel bearings as part of our maintenance update to the truck, it was a good opportunity to convert our later-model first gen Tacoma’s spindles and hubs to the traditional Aisin manual-locking variant (which were used on some pre-2000 Tacoma models). This greatly decreases the potential for premature CV axle wear under non-off road driving (especially when the new coilover suspension lift is installed, adding more angle on the front CV axles).
Plus old school manual locking hubs just look rad! (see the image below)
New Wheels & Overland Tires
A quality set of Overland Tires are one of the best improvements you can make to any overland truck.
We wanted something with the same vibe as our old 84 Toyota Pickup’s factory SR5 steelies, and found the American Racing AR23 wheels fit the bill while providing a slightly wider track. They were pretty budget friendly, and also came in a 15” diameter allowing us to run a set of BFGoodrich KO2 All-terrains in our favorite size: 33x10.50r15.

This tire size allows for maximizing ground clearance without over-taxing the truck’s axles and steering components off road, or requiring major modifications to the wheel well for clearance. Plus a full-size spare will still fit in the factory location under the bed of the truck.
*(This post contains affiliate links. This means we may receive a small commission, at no additional cost to you, if you make a purchase through a link. See our full disclosure.)
Stereo, Navigation, & Speakers

Modern after-market stereos can offer a TON of functionality over the stock units in older overland trucks like our first gen Toyota Tacoma.
The stock stereo and speakers had definitely seen better days, and we wanted some modern features like bluetooth, back-up camera compatibility (for better visibility with the Go Fast Camper installed), the ability to use Android Auto or Apple CarPlay for navigation and hand-free calls, and the option of Satellite radio if we wanted.
We found a Pioneer DMH 160-BT* double-din head unit and installed matching Pioneer speakers that checked all the boxes - for a budget-friendly price too!
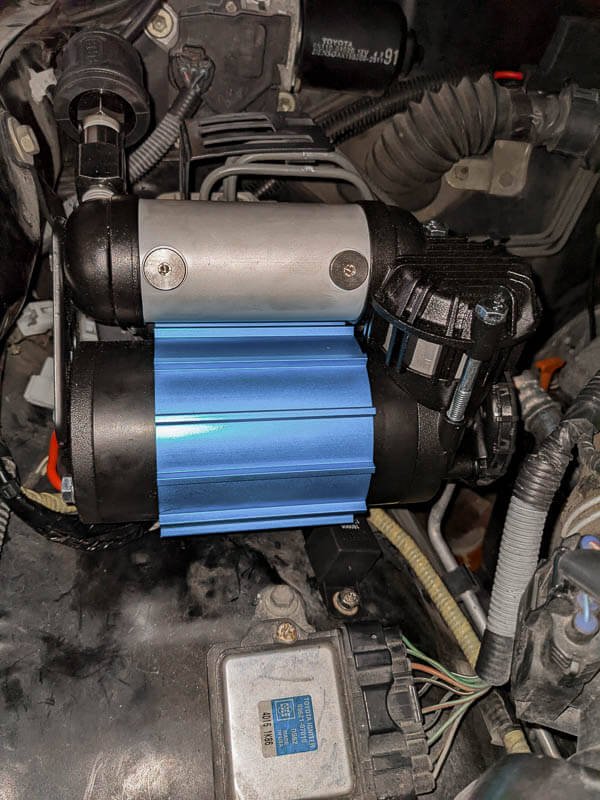
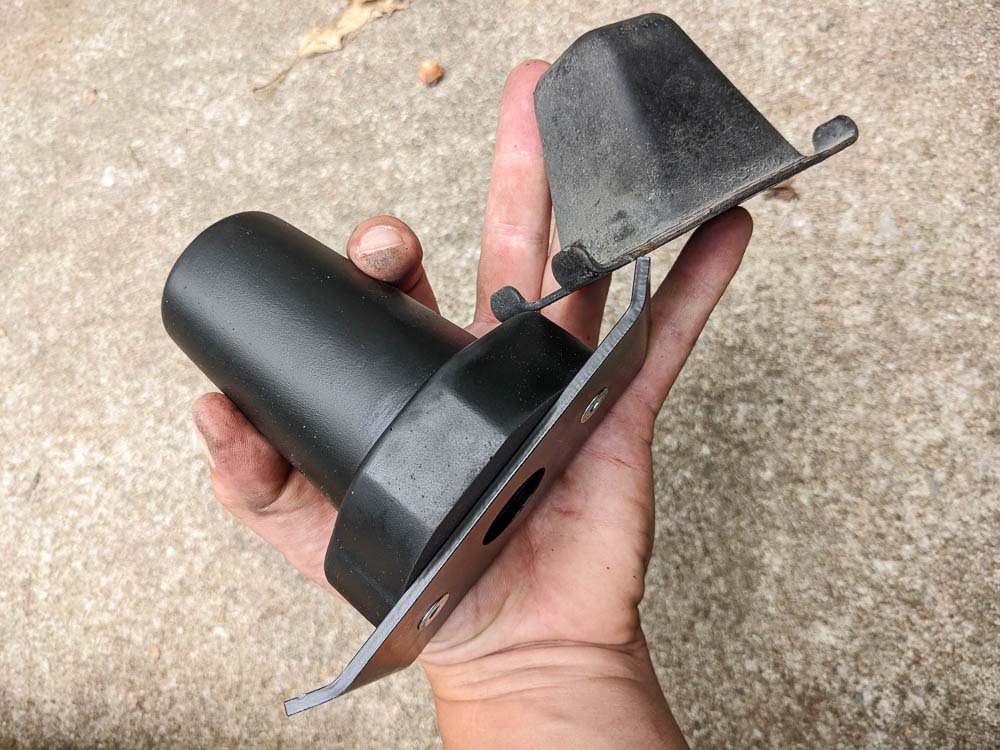
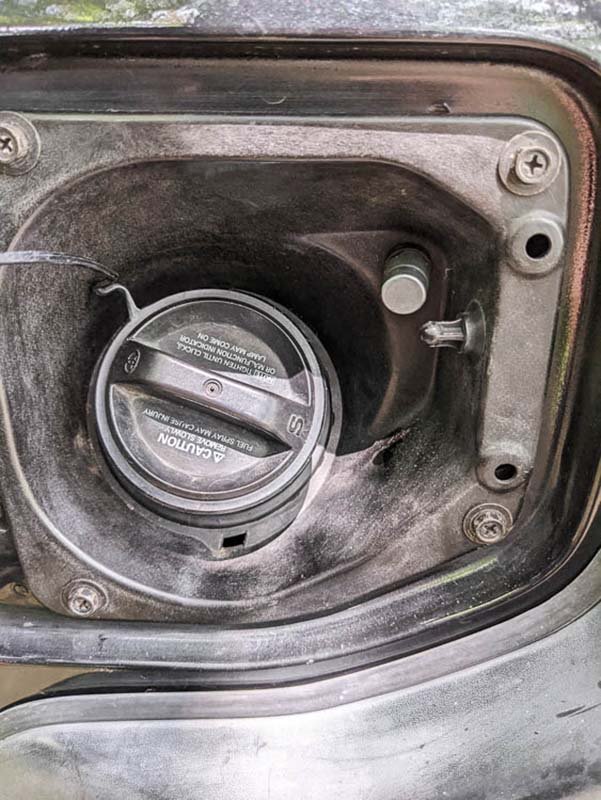
ARB Onboard Air Compressor Install
Onboard Air is incredibly handy for Airing Down Tires While Off Road, as well as for tire repairs, or operating an ARB air locker for increased traction off road (something we intend to install in the Tacoma’s front differential in the future).
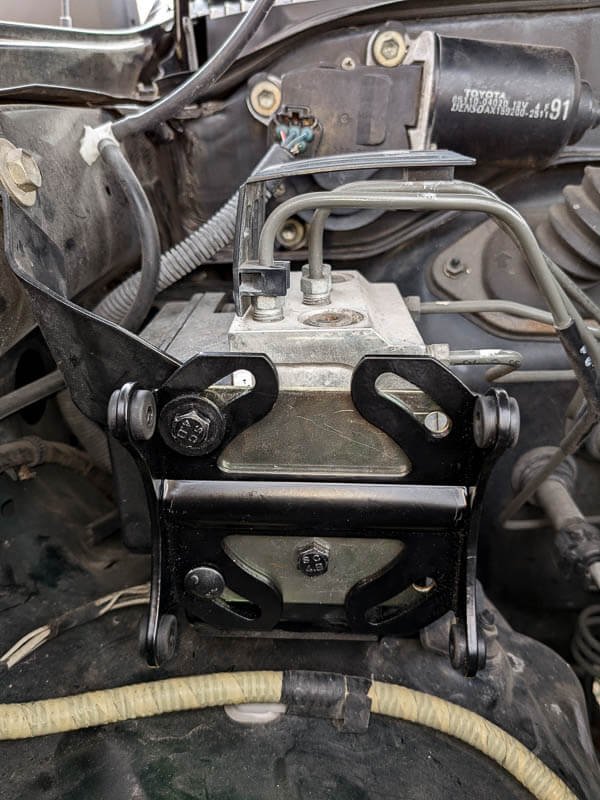

The Tacoma is equipped with anti-lock brakes, and thankfully the ABS control in our truck is the less-bulky variant of the three that were used on these 1st gen Tacomas, as space “under the bonnet” is fairly limited.
I had wanted to go with the larger ARB twin compressor but that simply was not in the cards with the real estate the ABS takes up, and after looking at methods others had used for mounting the smaller ARB CKMA12 compressor*, I was still pretty unsatisfied.
Then I took a closer look at the ABS actuator bracket and came up with a super simple mounting plan that only required drilling three small holes in the side of the ABS bracket. Then we just had to rotate the compressor’s mounting plane and outputs and it fit like it was put in at the factory!
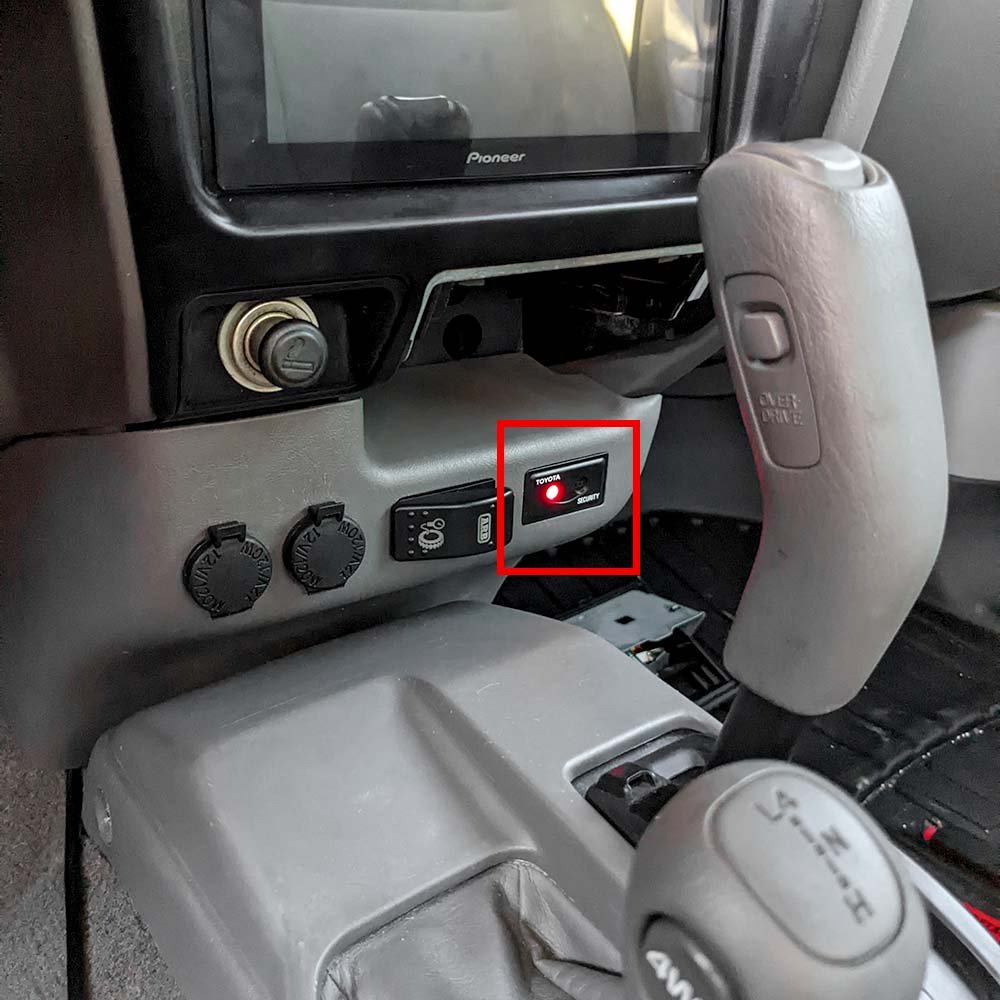
Security System
A security system is always a good investment on any overland truck or vehicle, and as luck would have it ours had one built in…sort of.
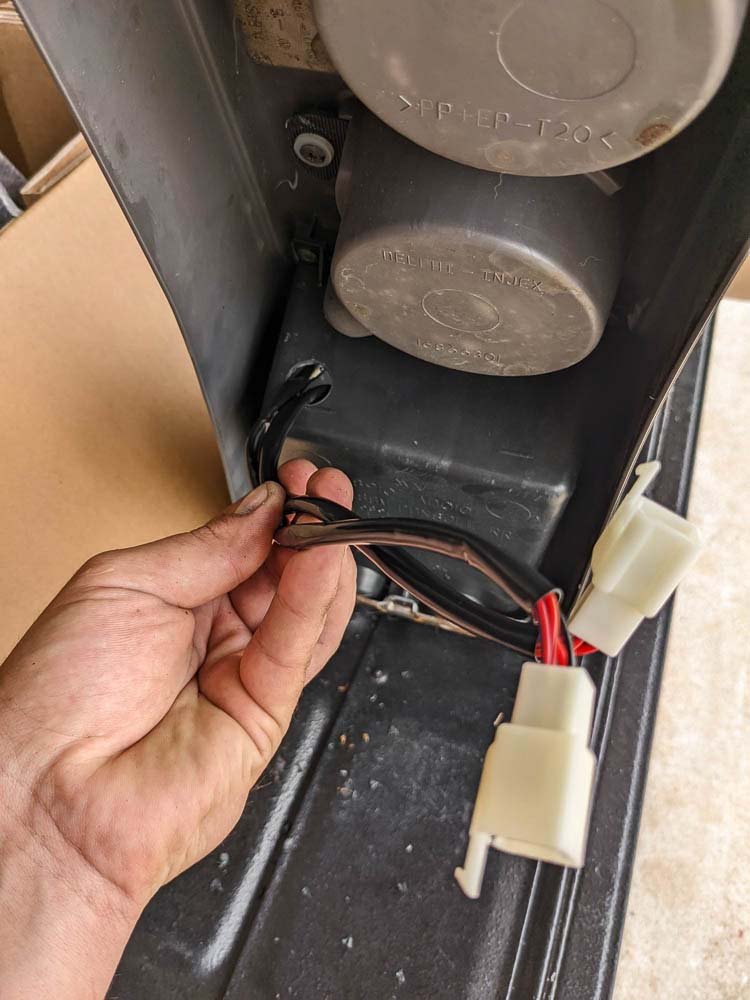
I’ve always had an affinity for Toyota’s little factory/dealer options, and the TVIP security system was a cool little one I’d had my eye out for - as our truck wasn’t equipped with it.
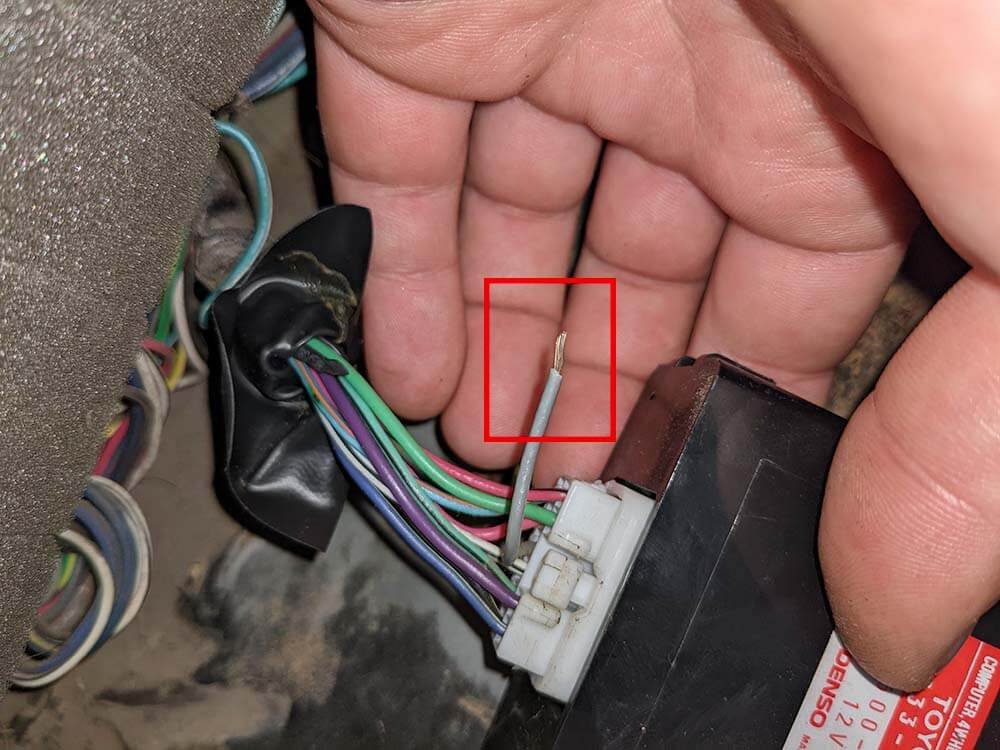
Essentially, Toyota included the RS3200 Security ECU into any 2003-2004 first gen Tacoma that had keyless entry and then dealers had the option to upsell the TVIP security alarm upgrade to customers which consisted of a little glass break sensor (GBS) and LED module that plugged into an existing harness behind the dash and once a single wire plug - usually white (pictured below left, taped off to another harness) - under the steering column base was disconnected the security system was fully activated.
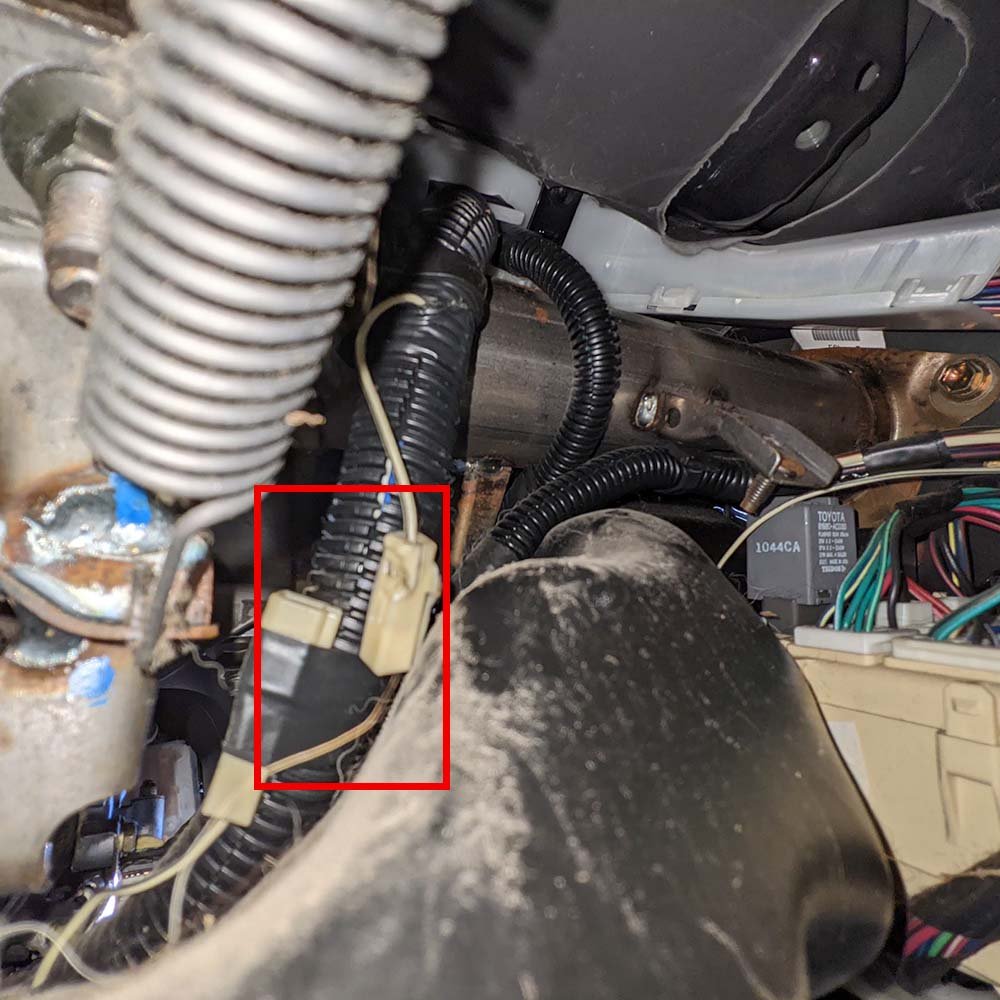
You can simply disconnect the white wire plug under the steering column (as shown above) and activate the security system (without the glass-break sensor capabilities) - this is referred to as the “free alarm mod.”
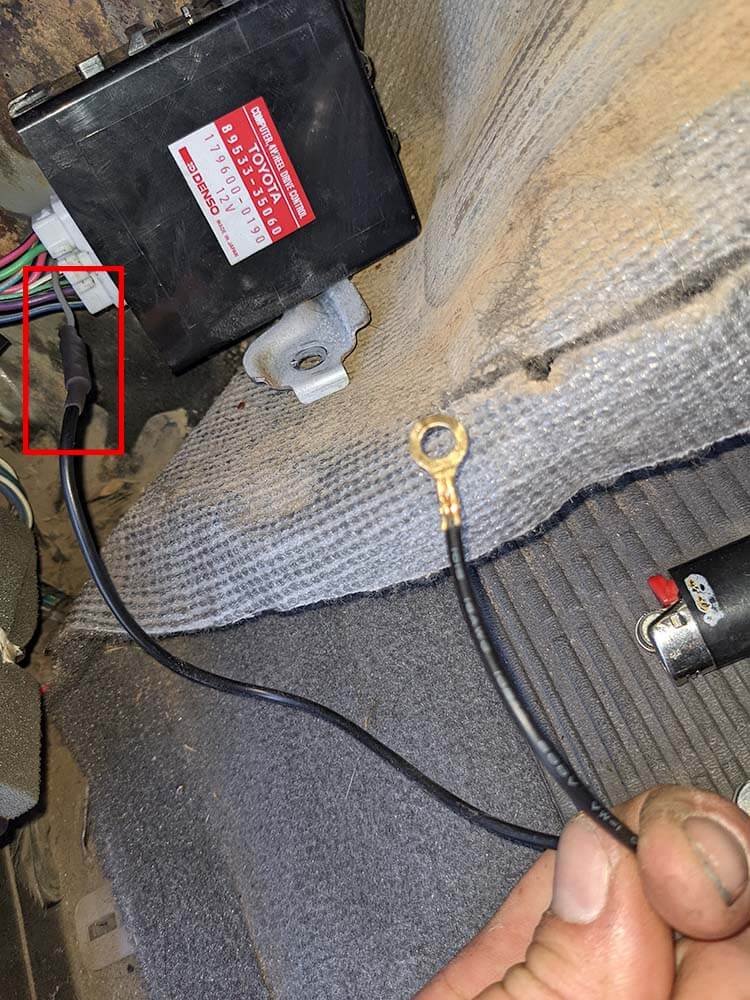
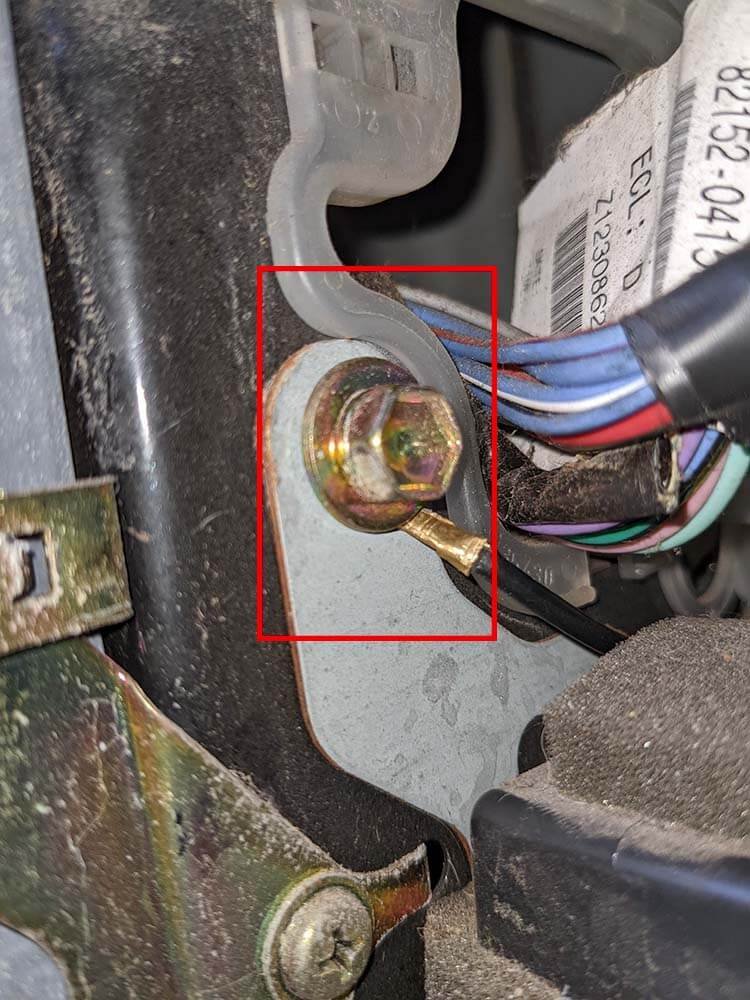
But I kept an eye out and managed to track down one of the Toyota GBS modules second hand, wired it up, and cranked the sensitivity on the back of the RS3200 security ECU to 11. Presto! Fully functional alarm system! The RS3200 provides forced entry and glass break detection, ignition switch tamper monitoring, and starter disable when the alarm is activated. You can see it in action in the video below:
This security system, combined with some strategically placed Apple Airtags* (to help potentially recover the truck in the event of a theft), and the other Wild Camping & Overland Travel Security strategies we employ will help give us piece-of-mind while traveling.
Rear Differential Locker & The Infamous “Gray Wire” Mod
Our Tacoma came with a factory electronic rear differential locker. However, Toyota limited the factory diff locker to only be able to be activated in 4LO. The well-documented “gray wire mod” allows for the full activation of the factory rear diff locker in both 2WD and 4HI.
It requires the removal of the driver-side kick panel, accessing the 4WD ECU, cutting the #8 pin position wire (which is typically gray, but not always), and connecting it to ground.
This super quick and easy modification greatly increases the Tacoma’s traction control options while driving off road - but you must be that much more careful to only use the differential locker at appropriate times and speeds or you’ll risk damaging the rear diff.
External Transmission Cooler
It’s important to identify and mitigate any of your overland truck’s short-comings before they become a problem on the road or the trail.
The factory automatic transmission oil cooler in our Toyota Tacoma is only a light-duty variant that is built into the bottom of the radiator. After flushing the transmission and refilling it with fresh synthetic ATF, I monitored the trans temps using our bluetooth OBD2Link MX+ OBD2 reader*.
I wasn’t happy with the temps, seeing 210-215℉ in heavy stop-and-go traffic on occasion, because left unchecked this could lead to premature transmission oil degradation or even transmission failure. So I decided to install a Hayden 678 external transmission cooler* and fabbed a piece of aluminum bar stock as a mounting bracket using the existing driver’s side horn mount and lower radiator support as attachment points.
I decided to route the Hayden cooler in-line after the factory trans cooler in the radiator before the oil returns to the transmission, as this would still allow the ATF to be warmed to operating temperature in cold weather.

So far, temps have remained below 200℉, usually falling in the 150-170℉ range. Even when driving in the summer heat and climbing grades through the mountains on our first trip, the temps never got excessive.
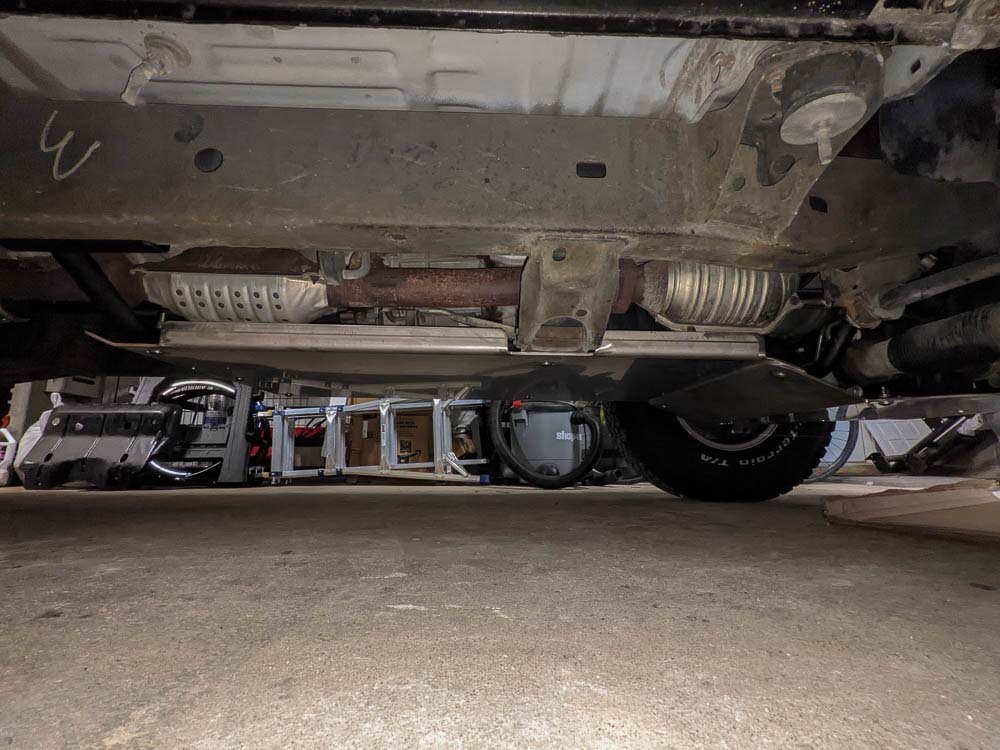
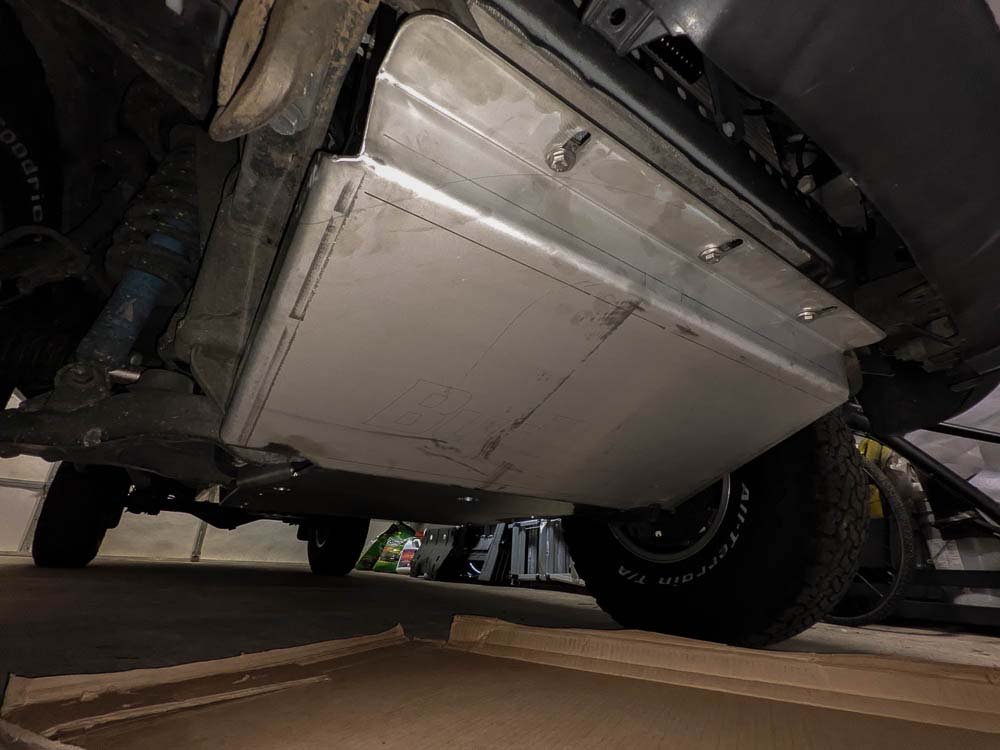
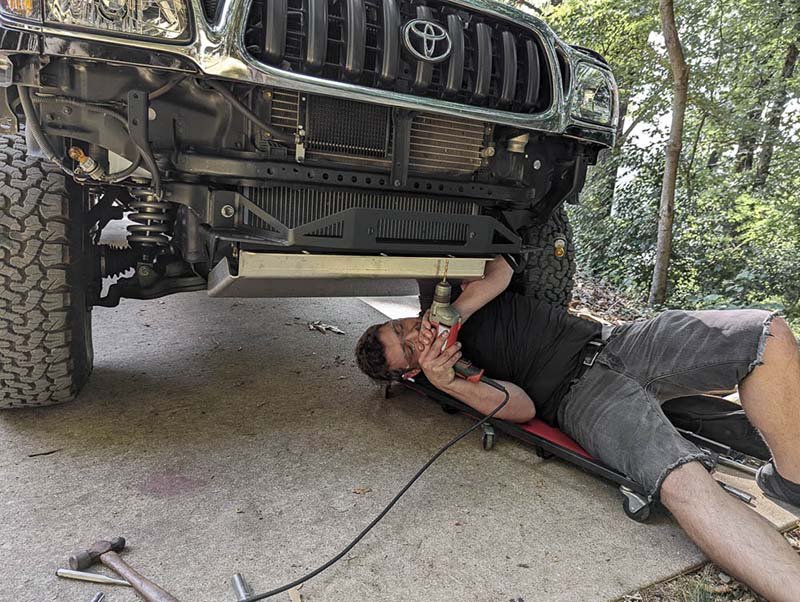
Off-Road Skid Plates & Rock Sliders
Skid plates are virtually a mandatory upgrade to any overland truck build, especially those with independent front suspension, in order to protect vulnerable mechanical components such as the oil pan, radiator, transmission, transfer case, etc. from damage while driving off road.
Rock Sliders, while not a necessary addition for overland travel, offer a ton of utility and will save your vehicle’s rocker panels from body damage on the trail. They provide an additional jacking point for your off road jack and add a step to make accessing gear storage on the top of your vehicle a bit easier.
**For a deeper dive into Overland Vehicle suspension systems and other important characteristics to consider when selecting an overland truck, check out our Definitive Guide to Overland Vehicles.**
I had originally kicked around the idea of fabbing up a custom set modeled after the ones Expedition Portal forum member @Box Rocket made for his old first generation Toyota Tacoma overland build.
But the goal of getting this truck build mostly dialed-in within a 6 month time-frame (prior to the arrival of our son) pushed me towards Budbuilt's 3-Piece Skid Plate solution (pictured above). It's a solid bolt-on kit and we're really happy with the quality. Plus, not having to mess with touchup paint on the stainless steel will be really nice.

After several close calls with the rocker panels on our local trails here in the Ozarks I decided it was finally time to break out the welder and add some Trail Gear Rock Sliders. I'm a novice welder, but the install went smooth and the welds turned out surprisingly decent - even with the little Harbor Freight portable flux machine I used.
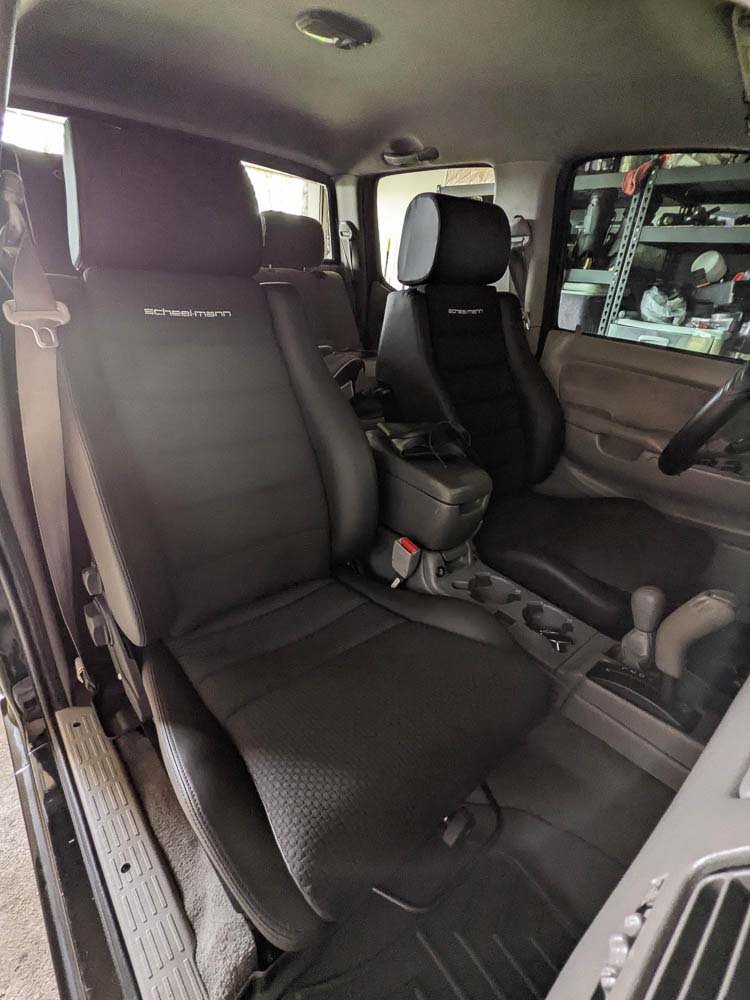
Scheel-mann Vario F Seat Upgrade For the Tacoma
If you travel at length both on and off road, you quickly realize how important a good set of seats can be to your overall enjoyment and comfort.
Lindsey has suffered from lower back issues off and on over the recent years - likely not aided by tens of thousands of miles exploring and off roading in our old leaf-sprung solid-axle Toyota Pickup 😬. And frankly, neither of us are getting any younger. So we decided, reluctantly, that it was worth investing in some high quality seats for our new Toyota Tacoma overland truck build.
We'd heard multiple rave reviews about Scheel-mann's Vario F/R seats from fellow travelers with back issues, and decided to bite the bullet. Toby and the rest of the team at Scheel-mann USA were a dream to work with and helped get our seats to us in time for our trip out to Montana to pick up the Go Fast Camper.
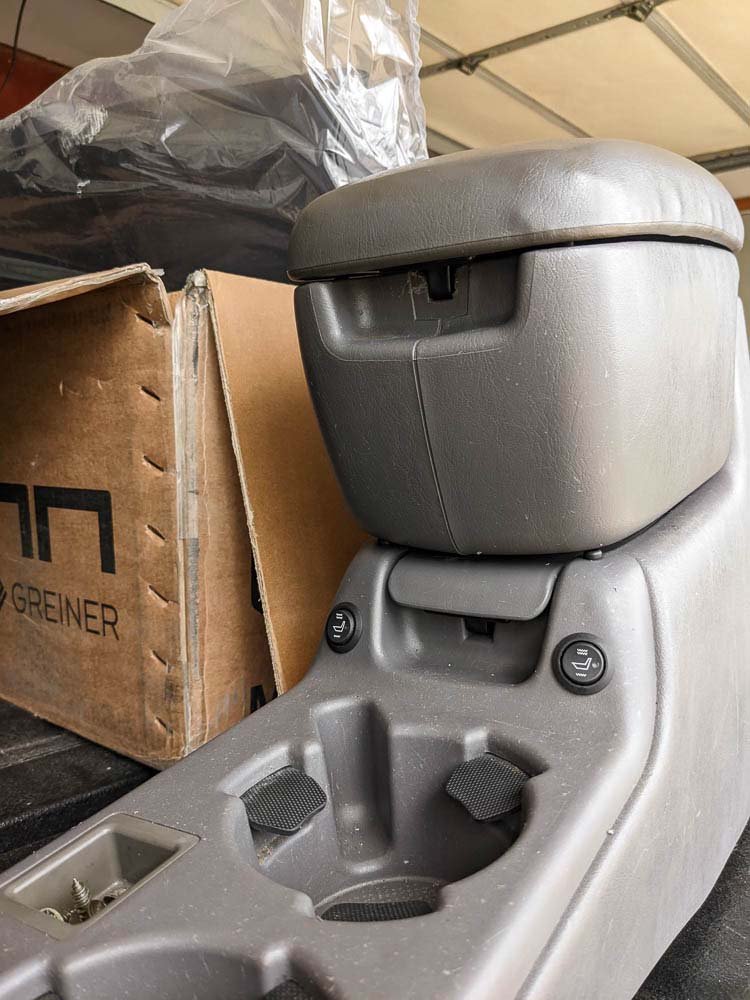
We opted for the optional heated seats, and I initially debated on tying into an existing 12v source for the estimated 10amps required. After hooking up one of the seats to our Watt Meter* to get an accurate read on the "real life" power draw (as I couldn't find this info anywhere online), we found that each seats draw 20 watts/~1.5 amp on LOW and 65 watt/~5 amp on HIGH which could be safely powered from one of the fused 12v sources inside the cab. But ultimately we ended up running a new dedicated fused power source directly from the battery into the cab for piece-of-mind.
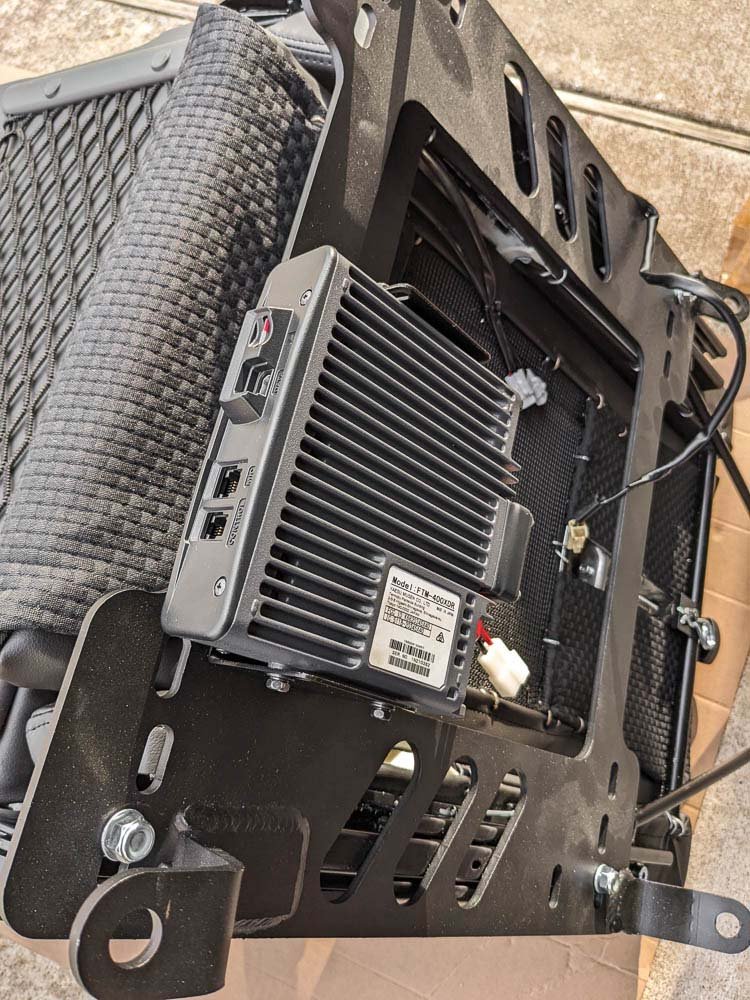
The wiring and relays were tucked under the center console and we found a good location in the console to mount the heat control switches as well. With both seats out, this was also an opportune time to run the power, antenna, and controller cables for our ham radio. I found a decent spot on the bottom of the Planted Technologies seat bracket adapter to mount the new Yaesu FTM-400XDR ham radio* (which we paired with the Comet CA-2X4SR* dual-band antenna) to before bolting the seats back into the truck.
**For a deeper dive into overland comms choices, check out our Overlanding Off Road Radios and Emergency Communication Devices guide.**
The immediate difference in comfort with the Scheel-mann Vario Fs was night & day, and they were an absolute dream on our first 4000+ mile trip out west through Montana & Utah - allowing us to easily tackle longer 12+ hour driving stints without pain, fatigue, or discomfort.
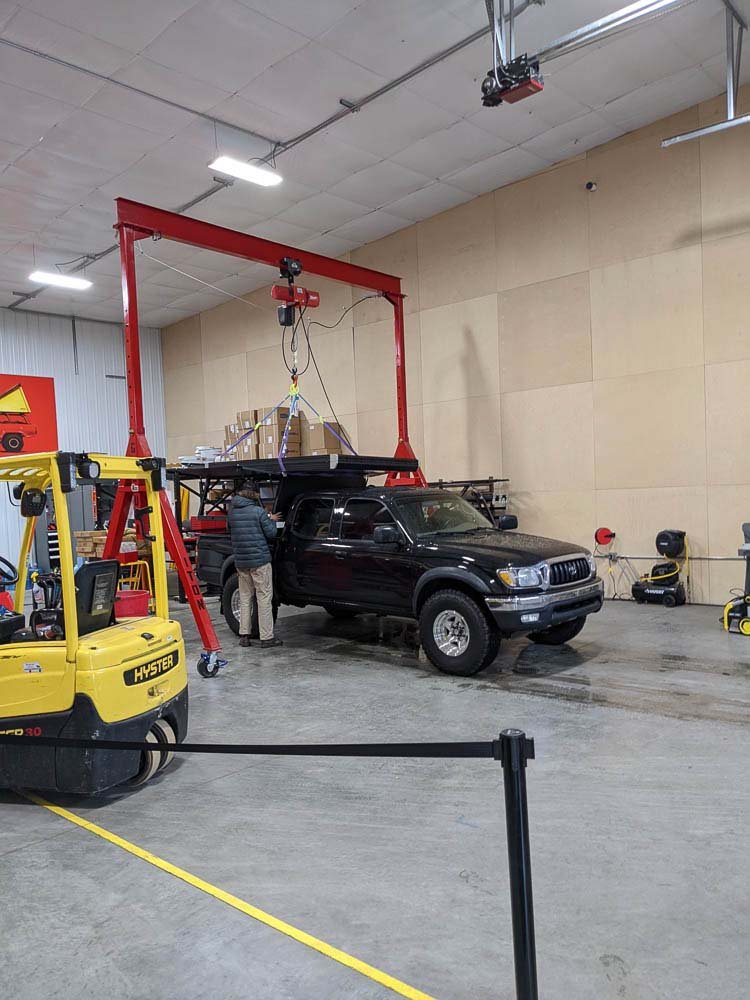
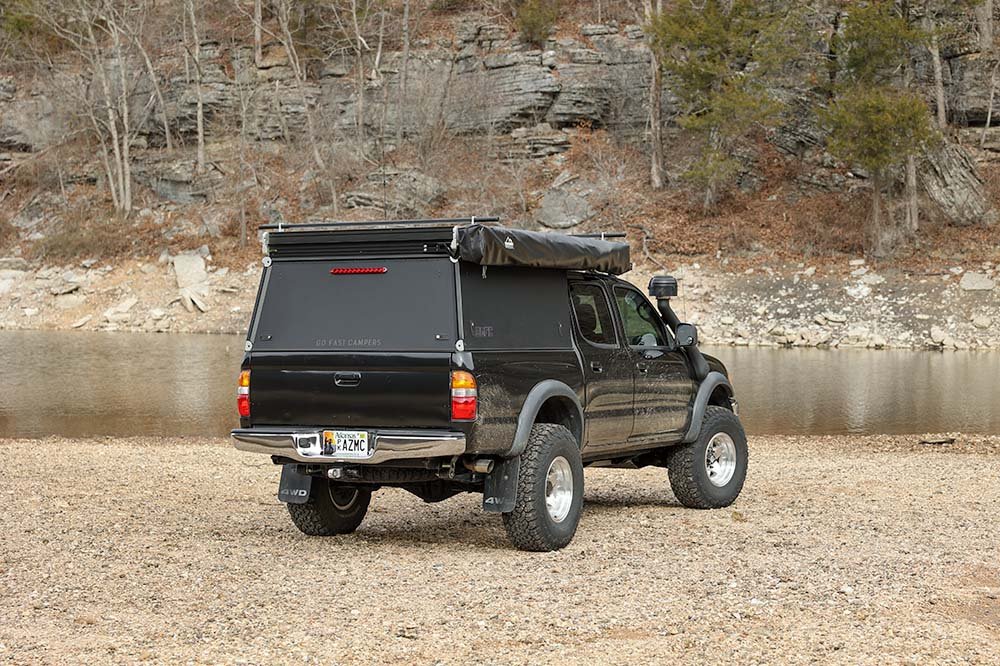
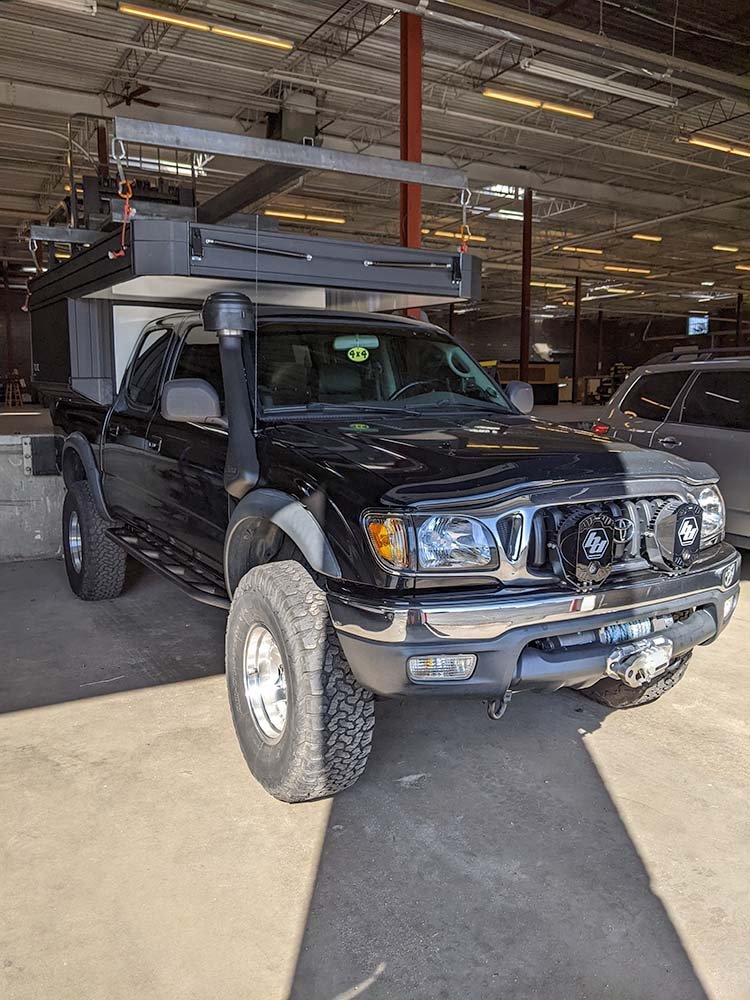
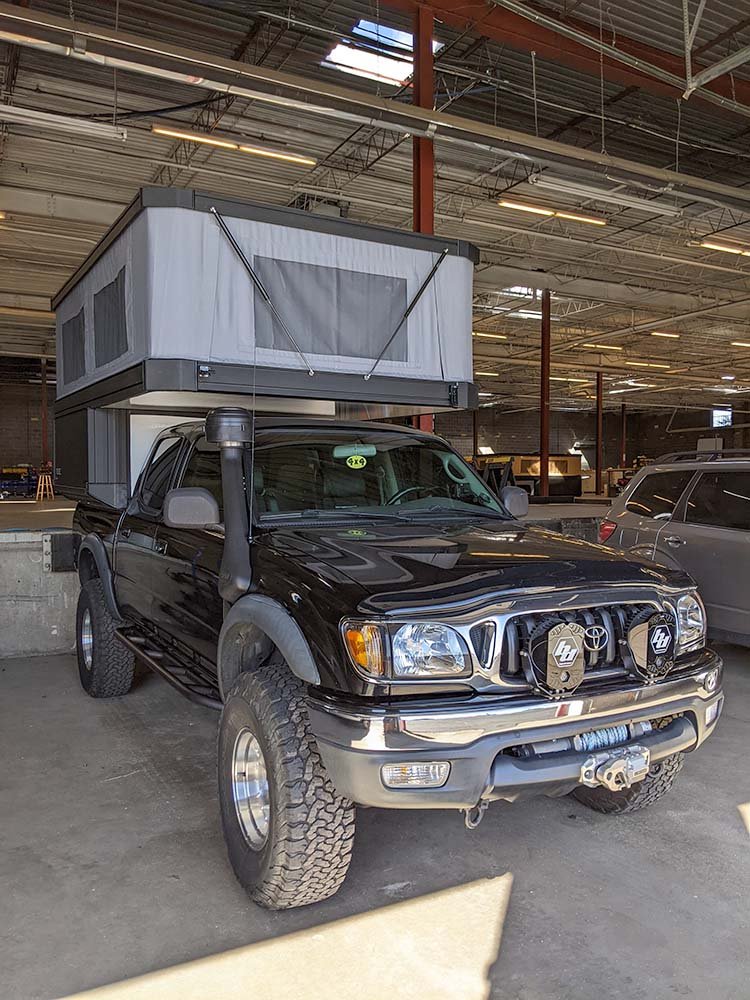
Go Fast Camper Install
We loved our first Go Fast Camper on our old truck (here’s an in-depth look at why we chose this camper) and we knew we’d want one on the Tacoma overland truck build too. So we took a trip up to Montana to see our friends at GFC and get their new V2 camper installed.
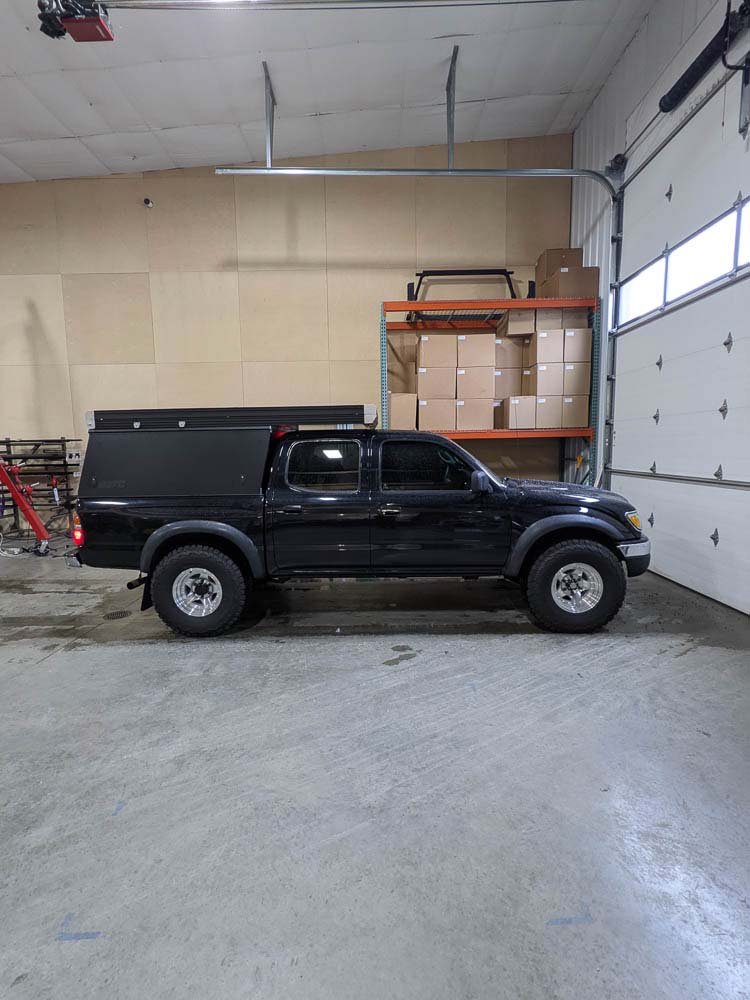
We had a great time exploring Montana and Utah after the camper was installed, despite the limitations of our very old, and very worn original stock suspension. Thankfully the awesome folks at Durobumps had gotten us some cushy front bump stops prior to leaving and they made a HUGE improvement in ride quality - helping to compensate for the inadequate stock suspension until our new suspension came in.
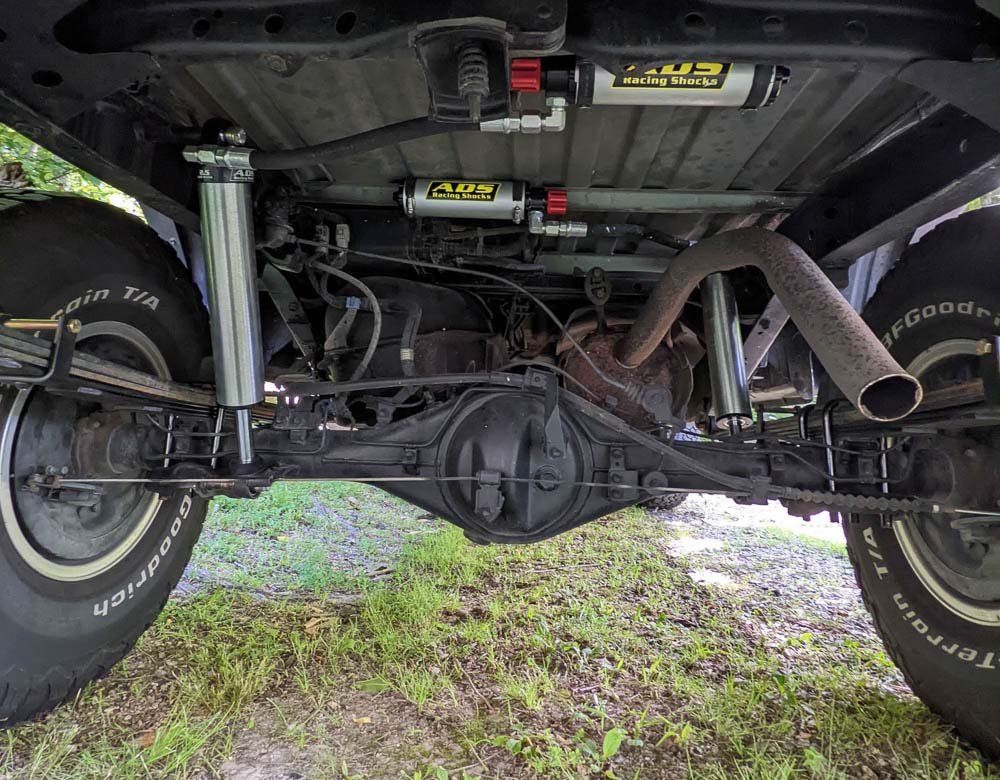
ADS Suspension Install
When we returned home from our maiden voyage we were met with an awesome surprise, the 2.5" Extended Travel Coilovers and Rear Shocks with Remote Reservoirs and Adjusters that we ordered from Arizona Desert Suspension had finally arrived!
Choosing a suspension setup for your overland truck build is a big decision, and plays a huge factor in how comfortable and capable your overland truck will be off road.
We had debated suspension choices pretty heavily, eventually narrowing it down to either an ADS or an Icon Stage 5 coilover suspension kit, or the classic Old Man Emu kit. Ultimately, the adjustability, serviceability, robustness, and race-truck pedigree of the ADS suspension won out. Plus, we’d literally heard nothing but praise from others who had invested in them.
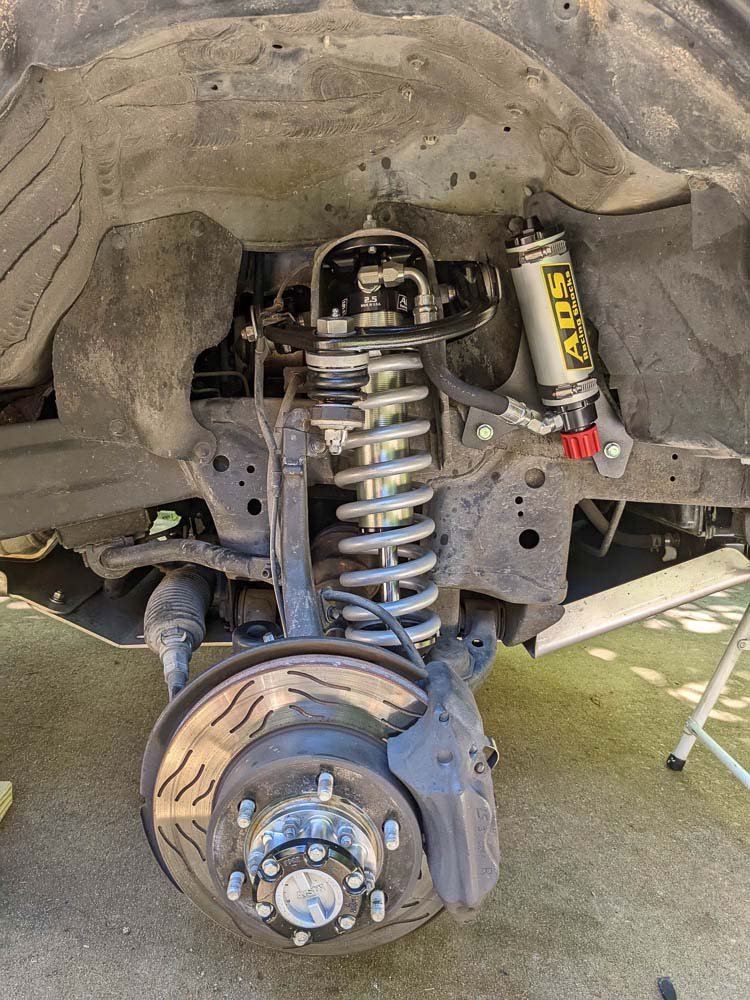
The front coilover installation was very straightforward and basically a bolt-on affair. The upgraded SPC upper control arms*, that allow for increased travel and fine-tuning of wheel alignment, required breaking out the ball joint puller and a bit more finagling.
Eventually we’ll weld a crossmember between the bed and frame to take better advantage of the rear shocks travel, but for now we managed to utilize the stock shock mount locations.
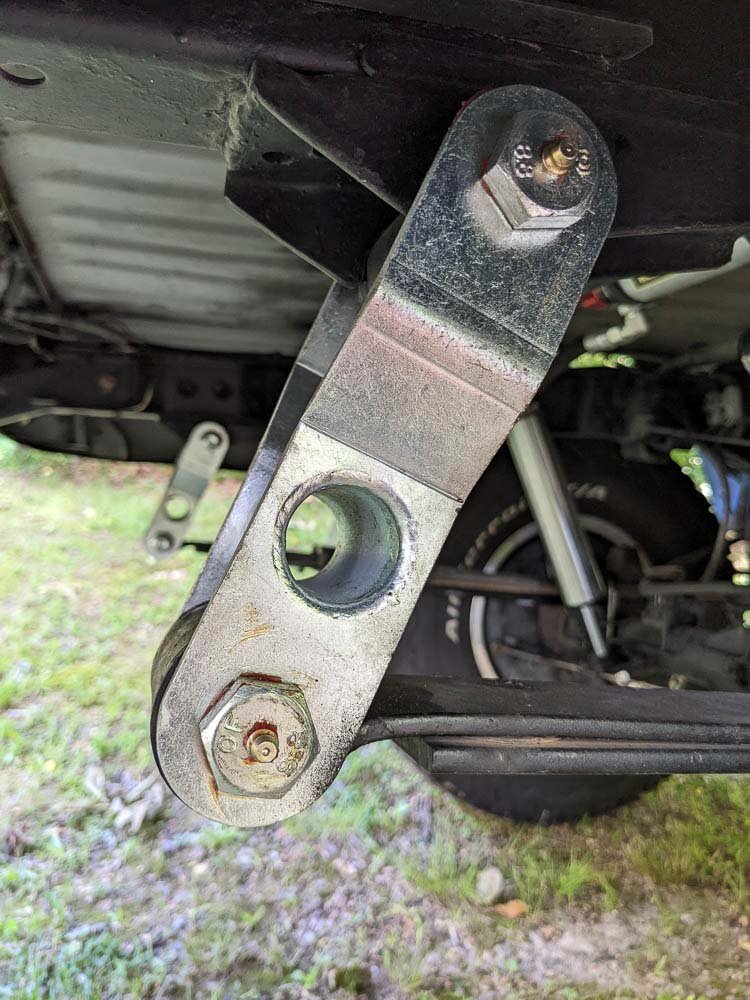
At the same time we installed Icon Progressive +1.5” add-a-leafs* on the stock springs (with the intent of installing a better set of Deaver leaf springs in the future to better handle the fully laden weight of the truck while traveling). We also added taller rear Durobumps 4.25” bump stops (to prevent the shocks from bottoming out), and some Daystar +1.25" greasable shackles.
So far this suspension combo has been a dream, the truck is super responsive, fun to drive in the curves, and is truly like floating on clouds off road compared to the old leaf sprung suspension on our 1984 Toyota Pickup overland truck build.
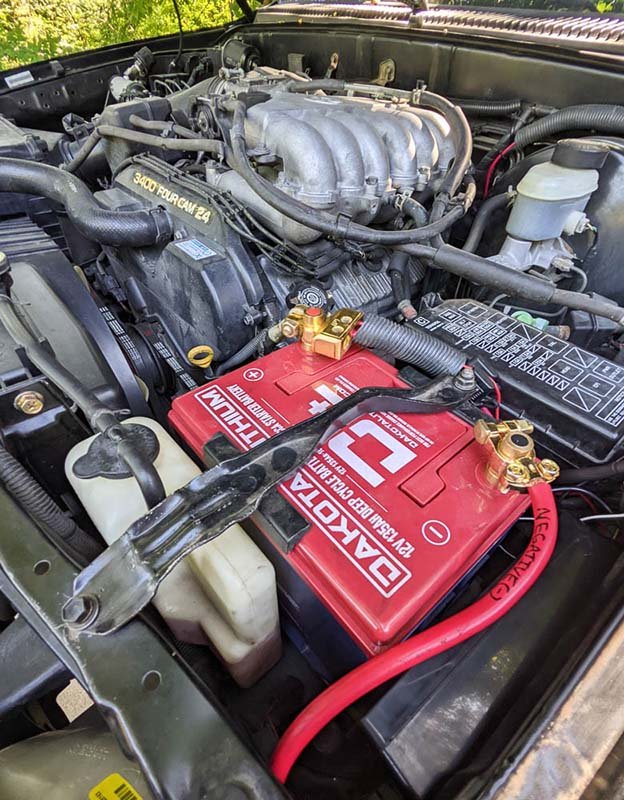
Overland Battery and Power System
Before our trip out to Montana & Utah we bought and installed the new Dakota Lithium DL+ 135ah Deep Cycle Starting Battery*, which just so happened to be a group 24 size and a literal drop-in replacement for the stock starting battery in the truck.
We ran power to the bed of the truck using an ARB wiring kit, some MC4 connectors, and a pair of marine 12v outlets for running the fridge and charging devices, etc.
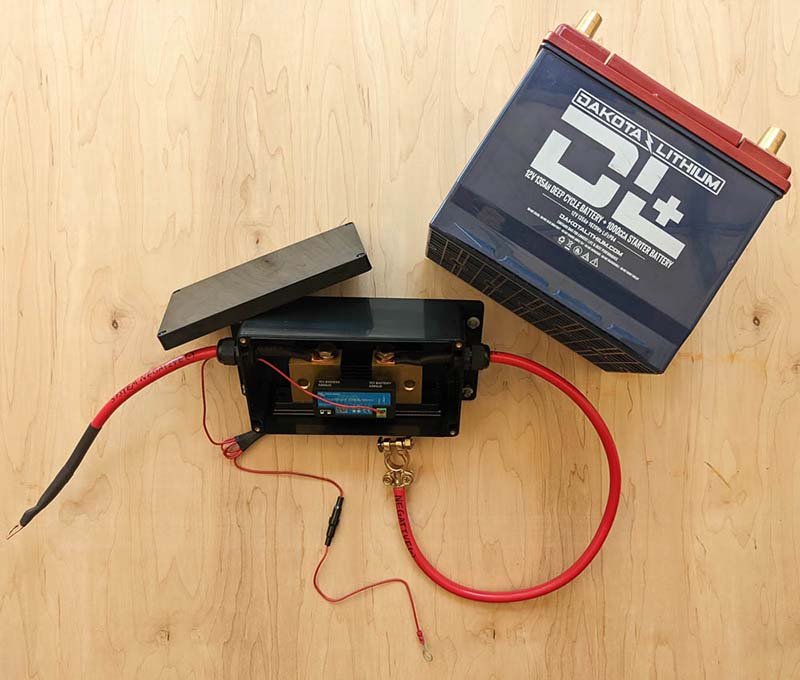
For the first trip we simply monitored voltage off our OBD2 Bluetooth reader and compared it to a Lithium Iron Phosphate voltage chart to make sure we were never dipping lower than 13.1v (we never even got close) and carried a NOCO Boost jumper pack as backup just in case. This setup worked amazingly well!
But when we got back we decided to install a Victron Energy 1000amp SmartShunt to monitor the power into and out of the battery more accurately and in more detail.
Long story, short: we're SUPER happy with this overland battery setup, and it has officially replaced the need for a traditional dual battery setup for our power usage and demands while overlanding.
Installing Hood Louvers
Hood louvers allow for increased air flow and ventilation throughout the engine bay and cooling system of a vehicle, and while they’re typically relegated to racing applications, they can provide a real advantage in off road driving conditions.
After adding the skid plates we noticed a slightly higher build-up of heat in the engine bay, as the skid plates restricted some of the airflow (especially in slow-moving 4wd instances in the sweltering 100 degree summer heat). Despite the fact that engine coolant temps remain perfectly healthy and static at 190.4℉, we didn't want this heat build up degrading plastics in the engine bay or negatively impacting the under-bonnet lithium battery.
So we decided to muster up the courage and install some hood louvers in our Toyota Tacoma overland build to improve engine bay ventilation. We found this set of 12" louvers that fit almost perfectly between the hood's structural supports, broke out the reciprocating saw, and got after it.
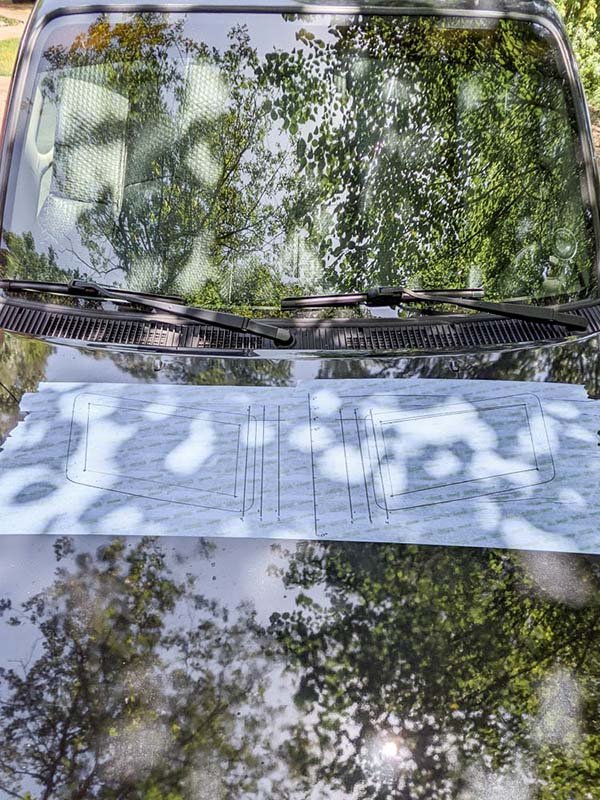
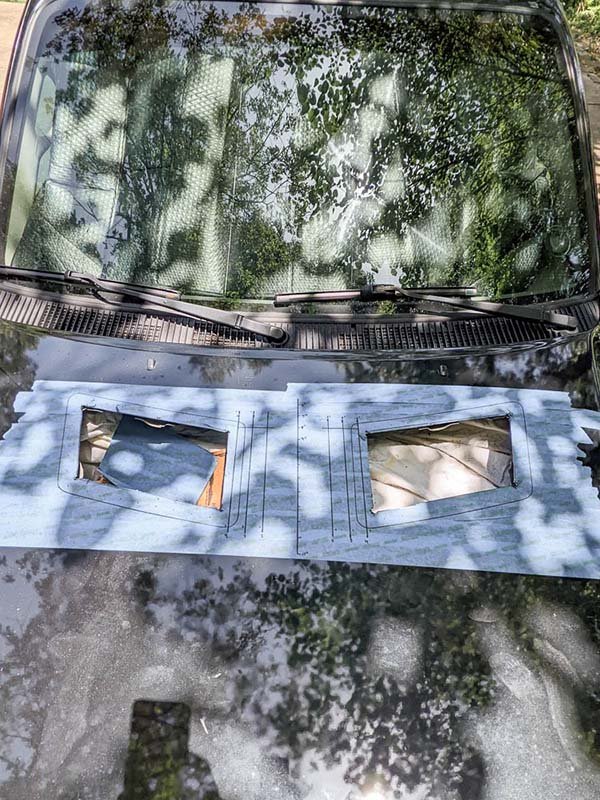
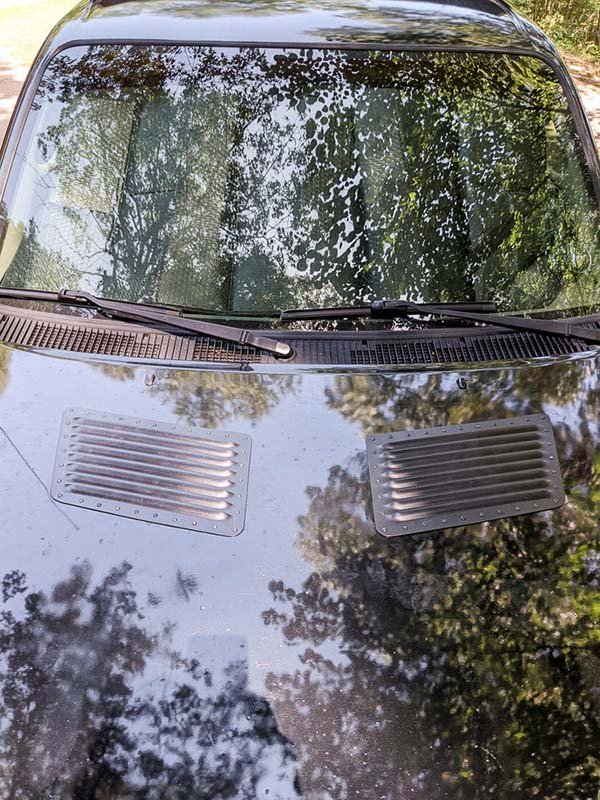
So far it appears to have accomplished everything we had hoped it would - lowering engine bay temps by 20 to 30 degrees on average while also improving cooling system efficiency as well.
Raised Air Intake Snorkel Install
While elevated intakes are a highly effective way of reducing dust/debris/water inhalation by the engine, we've always despised the aesthetics. We avoided installing one on our old '84 Pickup because the carbureted intake was set very high under the engine bay just below the hood.

However, the first gen Tacoma's intake drafts much lower - just above the passenger wheel behind the fender well liner. And after seeing the impact of Utah’s red dirt roads on the air filter, it was apparent that we'd probably have to bite the bullet and install a "dorkel" (as our family typically refers to them).
With the louver cutting and install behind us - what's another few holes in the truck body? Check out our guide Everything You Need to Know About Off Road 4x4 Snorkels for more details on the ARB Safari Snorkel* install and why you may want to install one on your overland truck build.
Sy-Klone Snorkel Pre-cleaner
To help keep rain, snow, and dust out of the new raised air intake snorkel (and to somewhat improve the look of the “dorkel”) we opted to install a Sy-Klone 9001 pre-cleaner on the Safari Snorkel.

Now we don't have to futz with rotating the ram air intake on the snorkel to the rear-facing position in the rain and snow, or when trailing others’ dust off road.
4x4 Winch Install
Despite the fact there's a perfectly good winch bumper sitting in the garage and the slightly improved approach angle it would provide, we kinda love the stock front bumper on these first gen Tacomas.
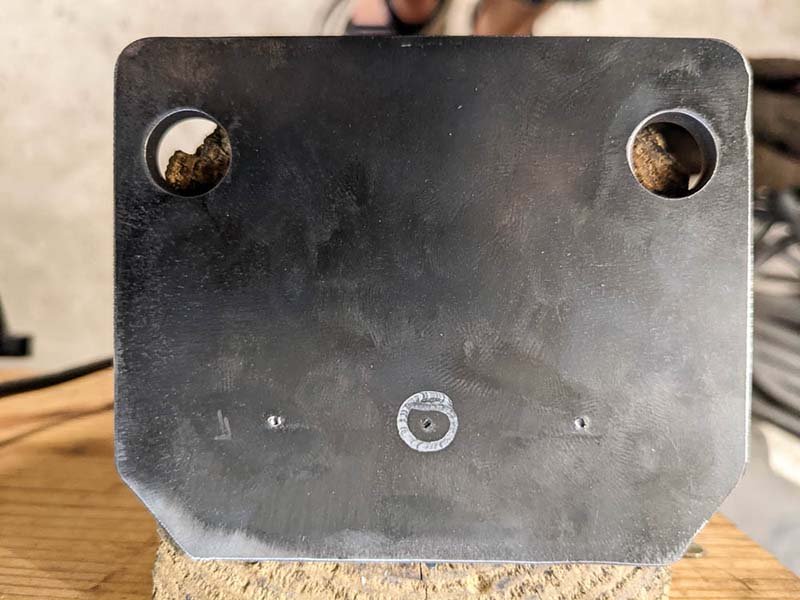
So after a bit of digging we found an awesome hidden winch mount made by a one-man-band fab shop up in Idaho called Amp'd Up LLC. The install was a pretty straight forward bolt-on affair, using factory recovery point and crossmember bolts - though you do have to drill & tap (M8-1.25) the mounting locations for your skid plate attachment.
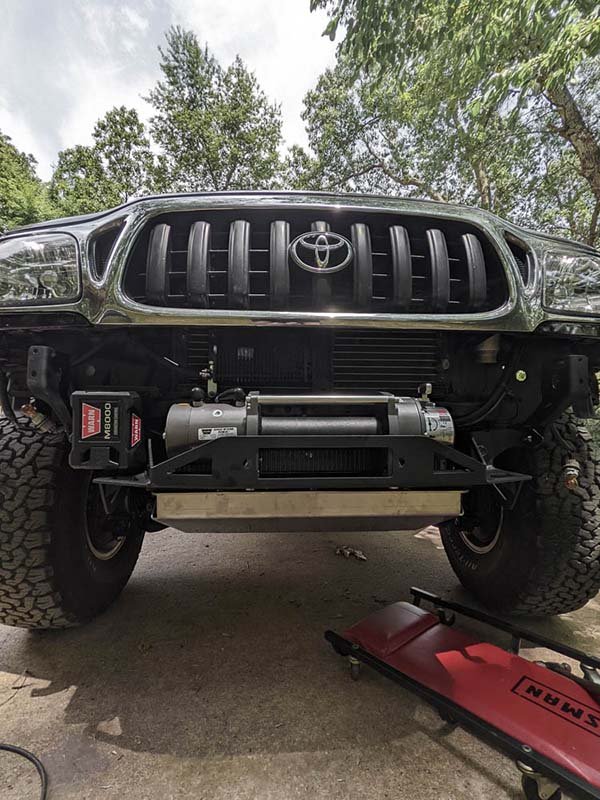
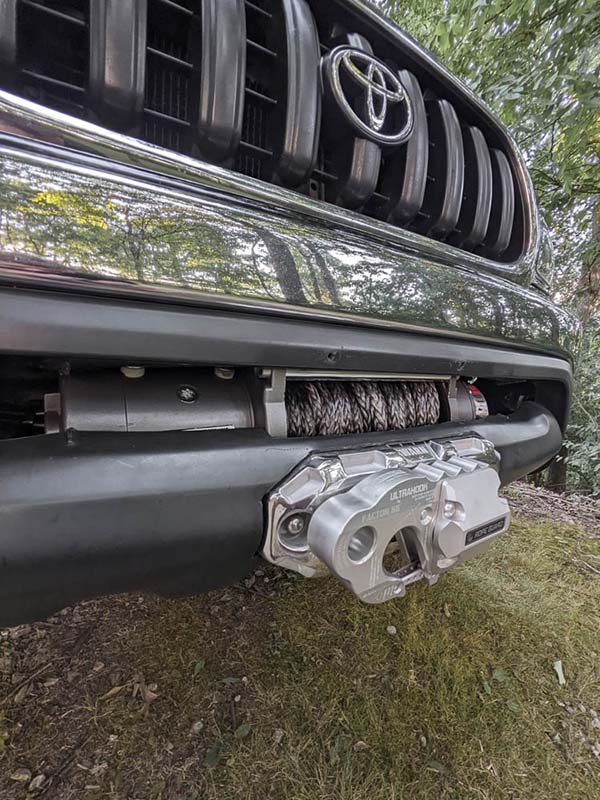
We stuck with the same tried and true Warn M8000 winch we've been running for the last decade, but opted to convert it to Warn's Spydura synthetic winch line* with a Factor 55 Ultrahook* on this build for the improved weight-reduction, safety, and field-repairability. We also opted to install Warn's thicker Epic 1.5" hawse fairlead* to help clear the factory bumper plastics and decrease stress on the winch line when performing angular pulls.
We wanted the finished look as clean and close to factory as possible, so notching the cut-out in the bumper plastics for the fairlead was definitely the most time consuming and tedious part of the install. Also finding a suitable spot to mount the upgraded contactor-based winch control box where it wouldn't interfere with the stock bumper was a bit of a challenge.
In the end we were happy with the fit and finish of the winch install, and even happier that our lithium battery has absolutely no problem putting up with the higher-amperage power demands of the winch under load!
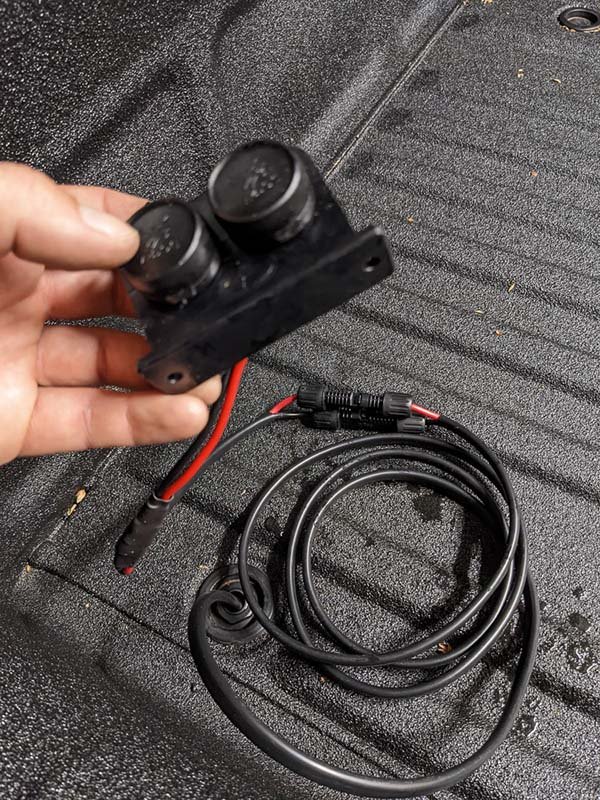
Off Road Lighting
Good off-road lighting is a crucial part of any off road or overland truck build, and there are a lot of great options on the market to choose from.
Selection:
We were always super impressed by the Baja Designs LP6 Pros we had installed on our old '84 Toyota Pickup overland truck. They provided more than enough coverage for our purposes, the hi/low beam option was nice for tighter trails or a faster pace, and the amber running lights are pretty cool too - so we knew we’d be happy with another set from Baja Designs. This go around we opted for their slightly larger LP9 Pro kit* that offers 9 forward facing LEDs per light (instead of 6) outputting 11025 lumens, versus the 8600 forward facing lumens of the LP6.
Mounting:
However, mounting options for the first gen Tacoma’s stock bumper were non-existent. So our options were to either mount them up high over the cab on the front of the GFC (not ideal, and we had concerns of glare issues in poor visibility weather), or fabricate custom mounts for the stock bumper.
We opted for the latter - using some old rock slider L-brackets we had laying around in the garage, we cut them down flat to 3.25" x 4"; then we marked and drilled the mounting holes for the LP9 brackets:

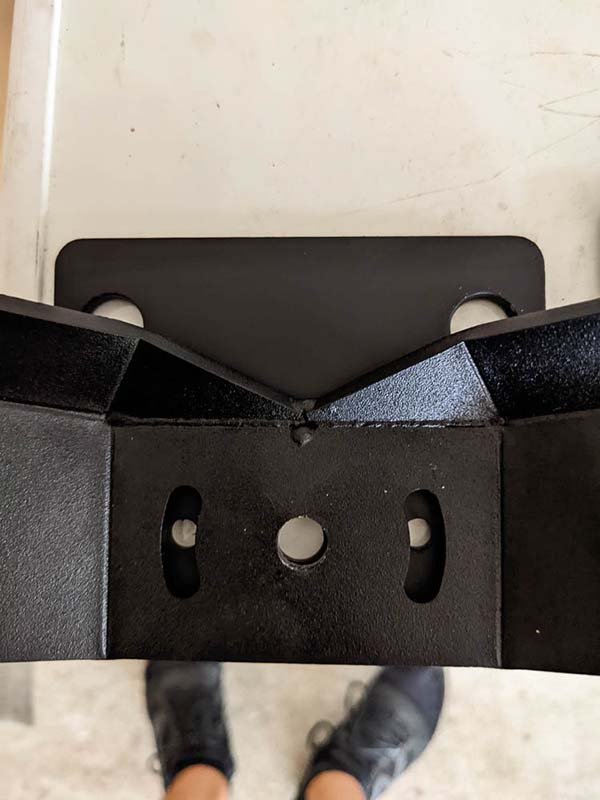
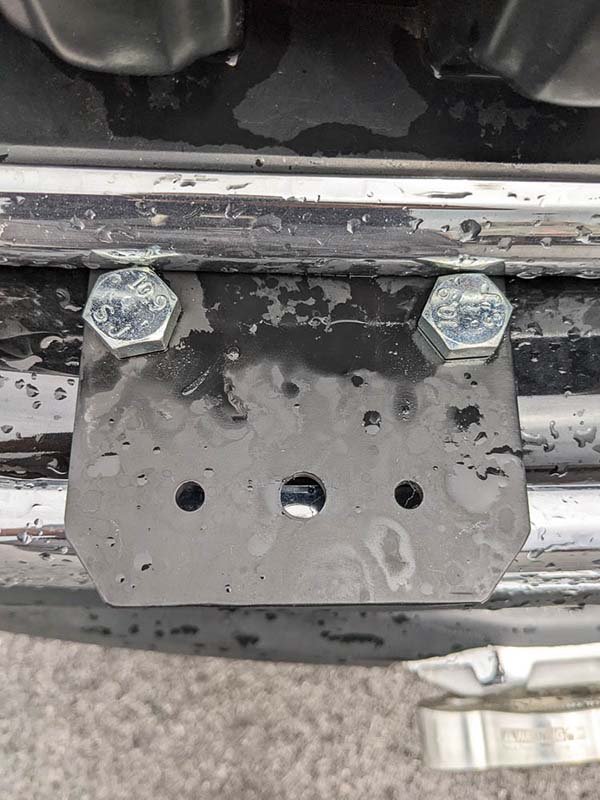
We drilled two 1/2" holes in the top of the bumper for each bracket to mount to, and used M12x1.75 bolts backed with thick 2" washers and Nylock nuts on the underside of the bumper to secure the mounts. Then it was time to wire everything up!
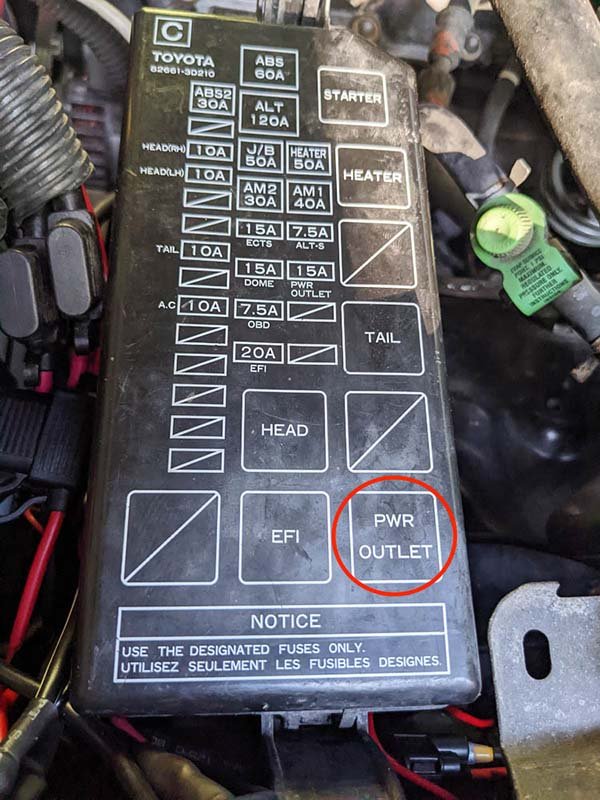
We used Baja Design's LP9 wiring harness and shortened all the power leads to fit our application. We tapped into our 12v ignition-on source (after some trial and error with a voltmeter) from the lowest prong on the "power outlet" relay in the fuse box for the amber running lights.
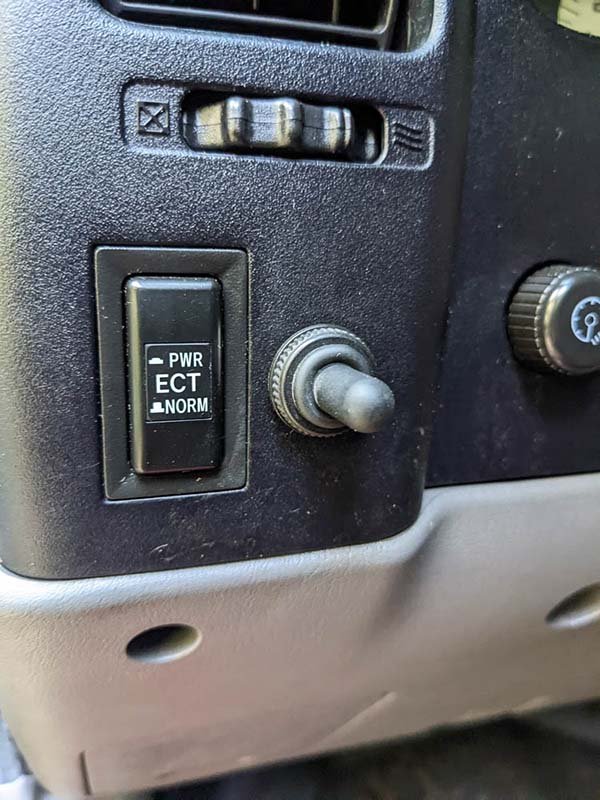
Then we installed the DPDT switch in the left side of the dash next to the Tacoma’s ECT button using a step drill to make the required 1/2" opening. This is my favorite spot for an off road light on these trucks because it sits just past the headlight controls on the steering column and feels very natural.
The kit we got included rock guards for the lights (something we had wished we had for the LP6s on the old truck). These LP9s are more than enough for our purposes, and we're really happy with the way the install turned out.
Exhaust Upgrade
The original factory muffler on our Toyota Tacoma overland truck was on the last of its legs and when one of the seam welds finally let go it was time for an upgrade. After some research, we decided to install Magnaflow's bolt-on performance exhaust kit.
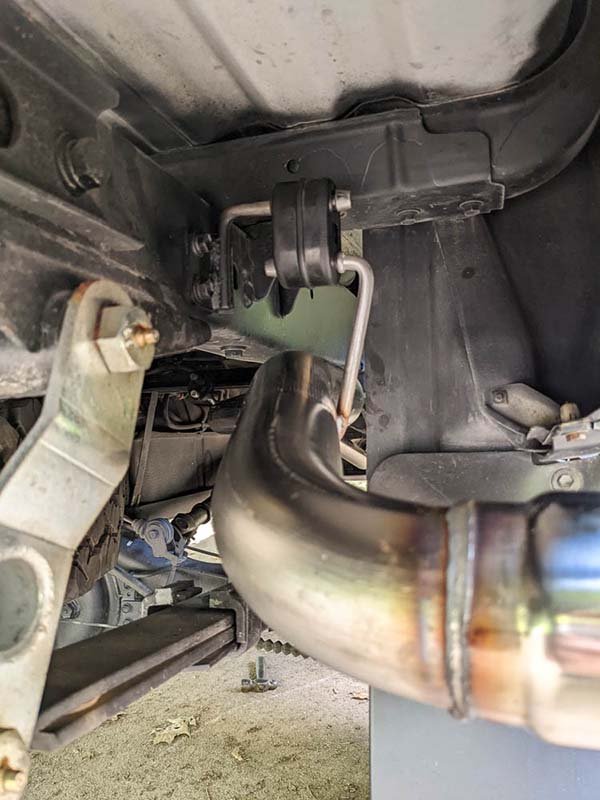
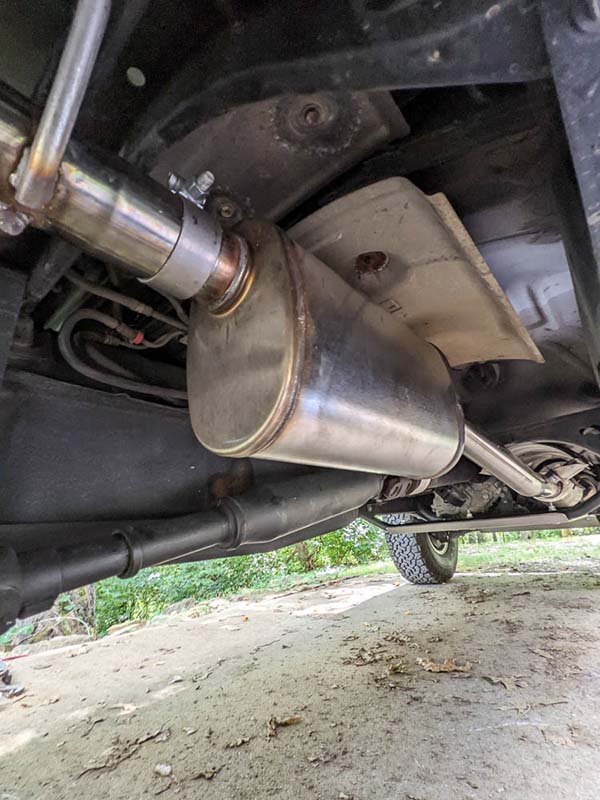
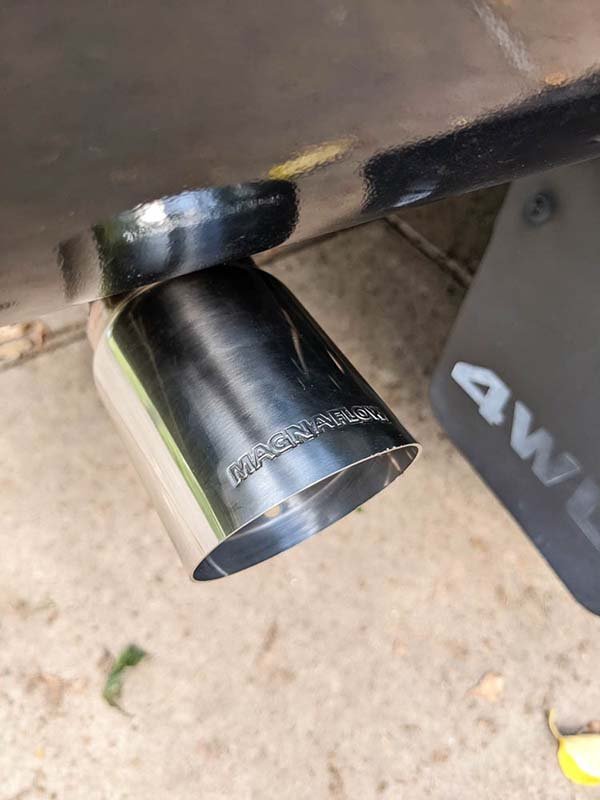
After procuring two replacement rubber hangers, a new downstream O2 sensor gasket, and a new flange gasket, the install was extremely simple and pretty straightforward.
The kit improved clearance for the spare tire, ground clearance for the muffler, and elevated the tailpipe to a better location that wouldn’t risk interfering with the leaf springs or shackle. And the truck actually sounds like a truck now!
Raised Axle Breather
The stock rear axle breather on the first gen Tacoma, as with all our previous Toyotas, is right on top of the axle housing, leaving it vulnerable to water ingress - namely when entering a deep water crossing with a warm axle/diff.
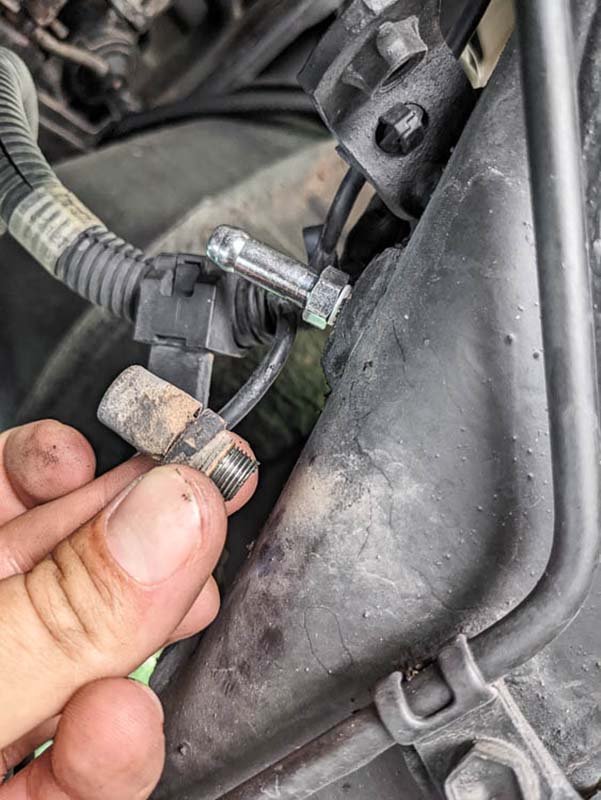
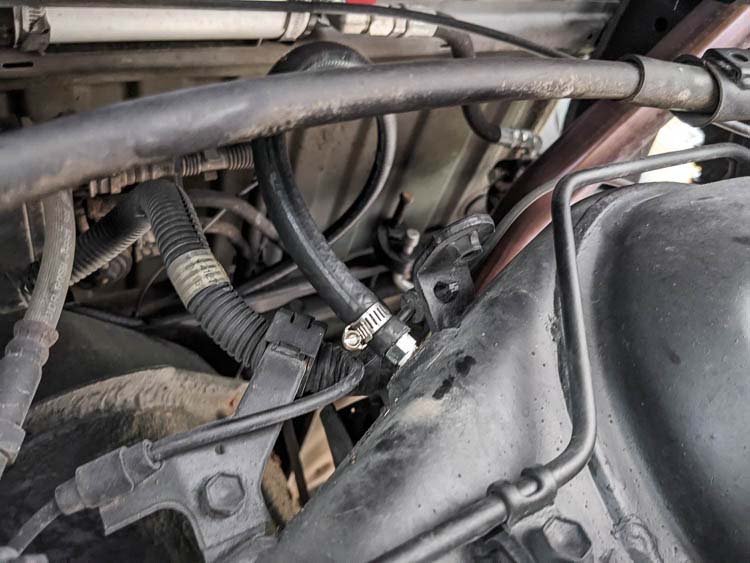
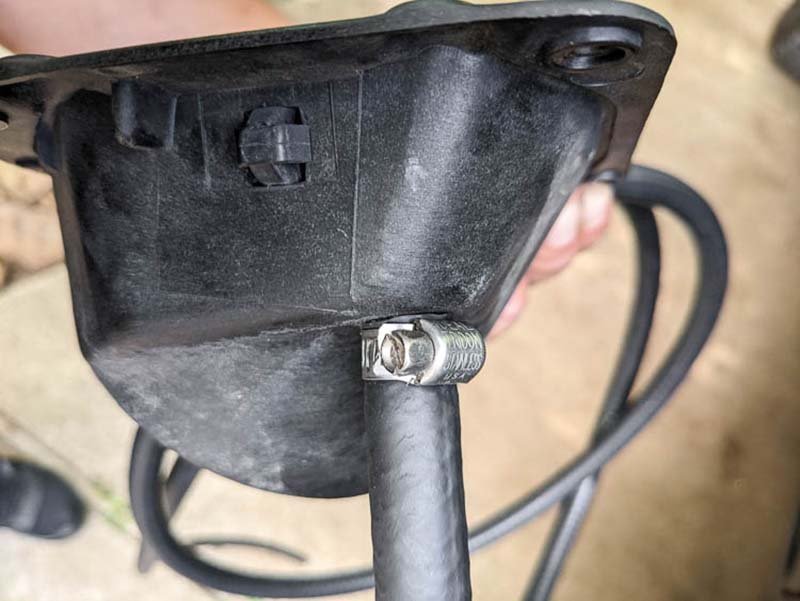
We solved this by raising the differential breather using about 6ft of 3/8" Gates fuel line, a Toyota union fitting (PN 90404-51319), a Toyota Breather (PN 90930-03136), two hose clamps, and a step drill to make a 3/8" opening in the fuel neck shroud to house the new elevated breather.
A cheap little peace-of-mind project, to resolve a potential future problem on the trail.
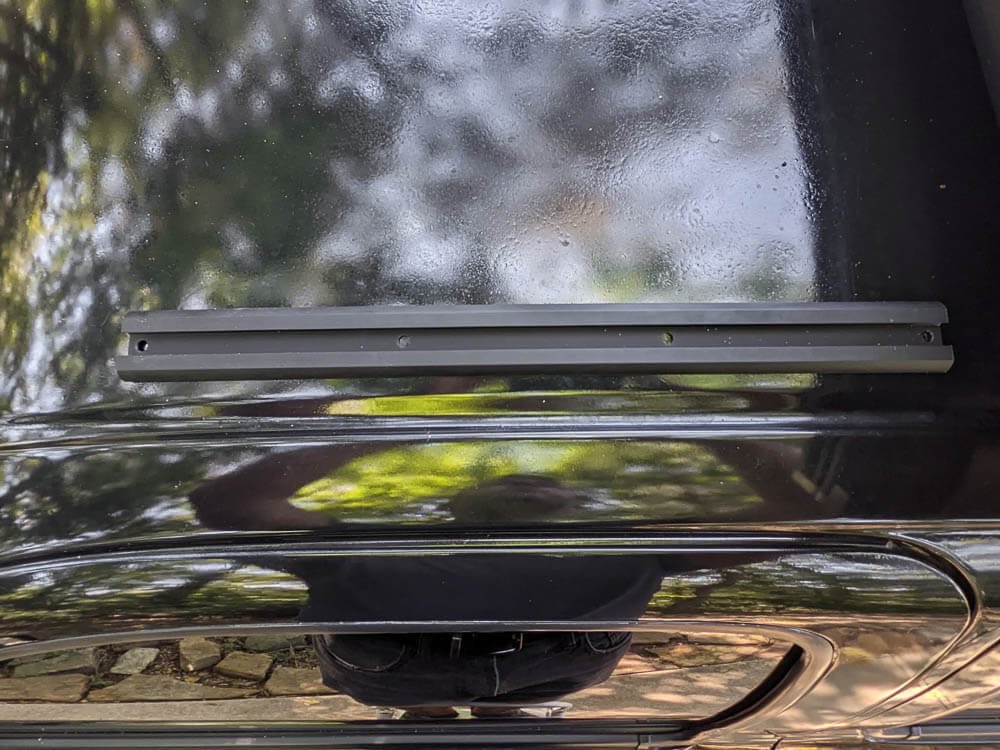
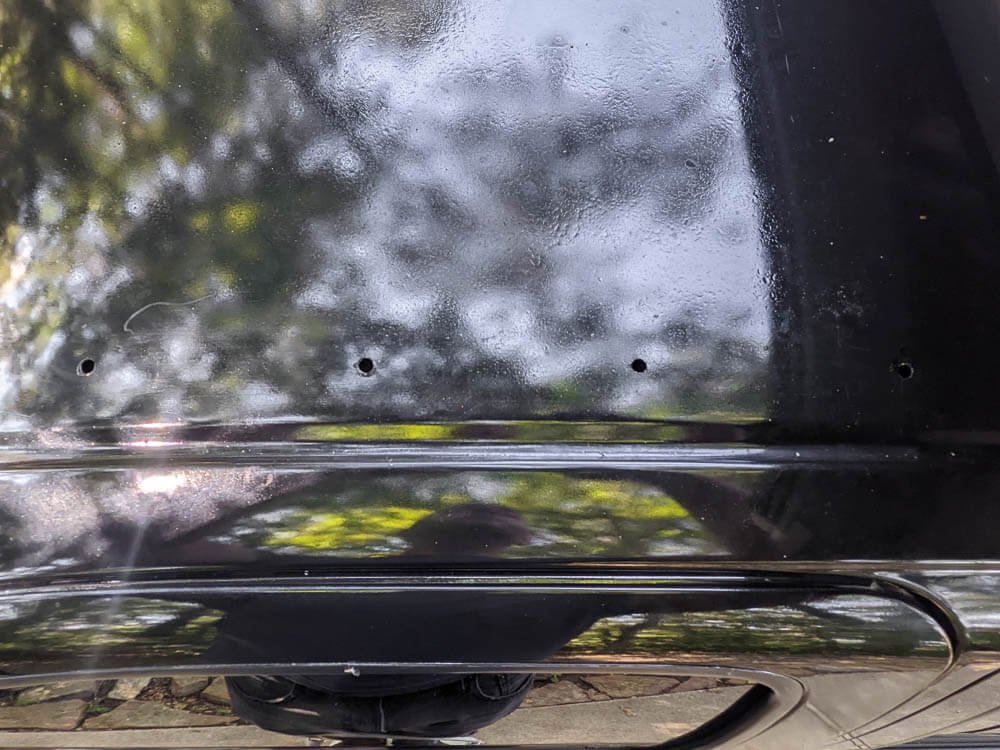
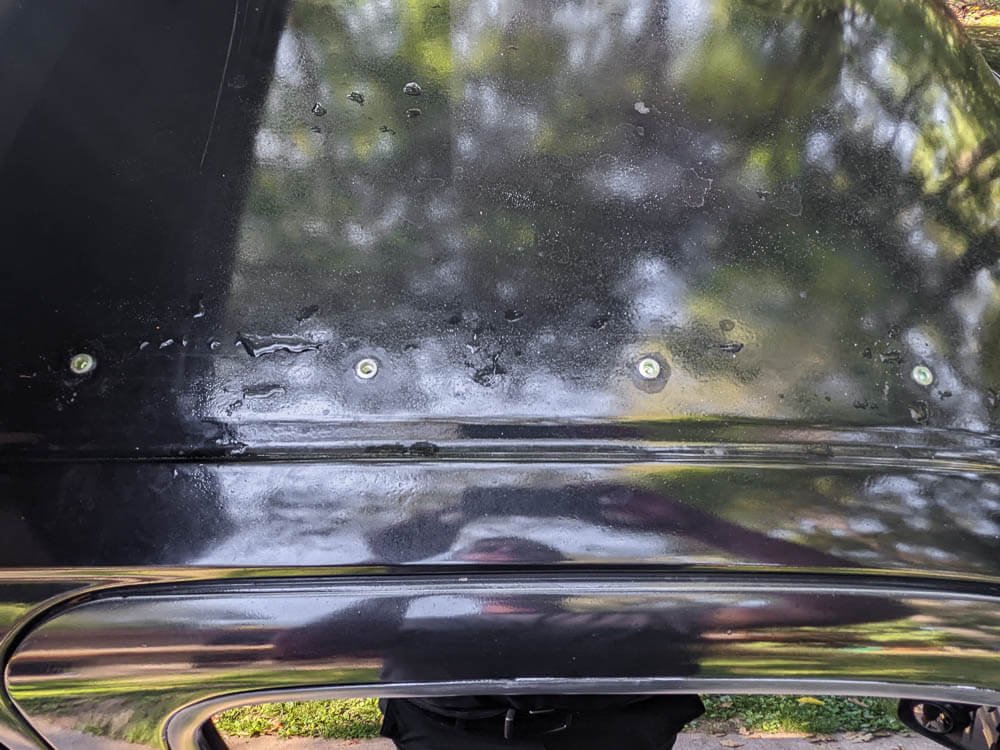
Roof Rack Installation
Since there were not any roof racks designed to fit in front of the Go Fast Camper on the first gen Tacoma, we opted for a DIY roof rack solution. We started by installing a set of modified Thule T-tracks* on the roof - cutting a 60” set down to fit in front of the GFC, and then bending them slightly to match the contour of the roof.
Next we mustered up some courage, carefully marked and drilled the roof for the supplied Rivnuts, coated the Rivnuts with waterproof marine RTV sealant, and installed them using the included Rivnut tool. Then we mounted the T-track, again using ample waterproof marine RTV sealant on the screws that threaded into the Rivnuts. Once the sealant had cured we tested for leaks - thankfully there were none!
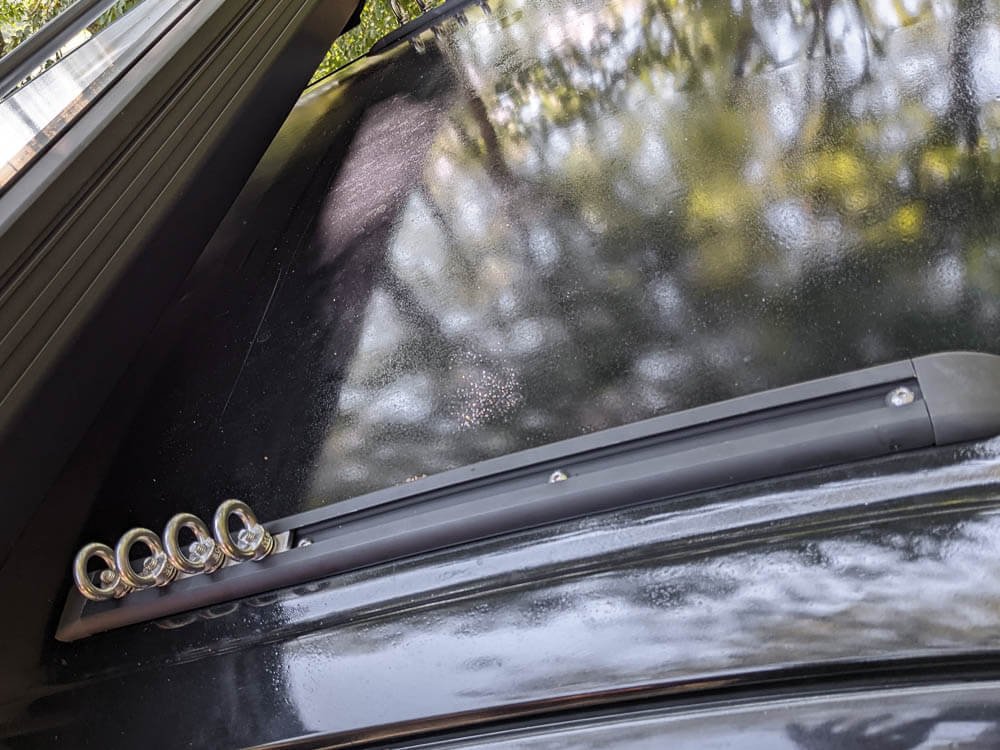


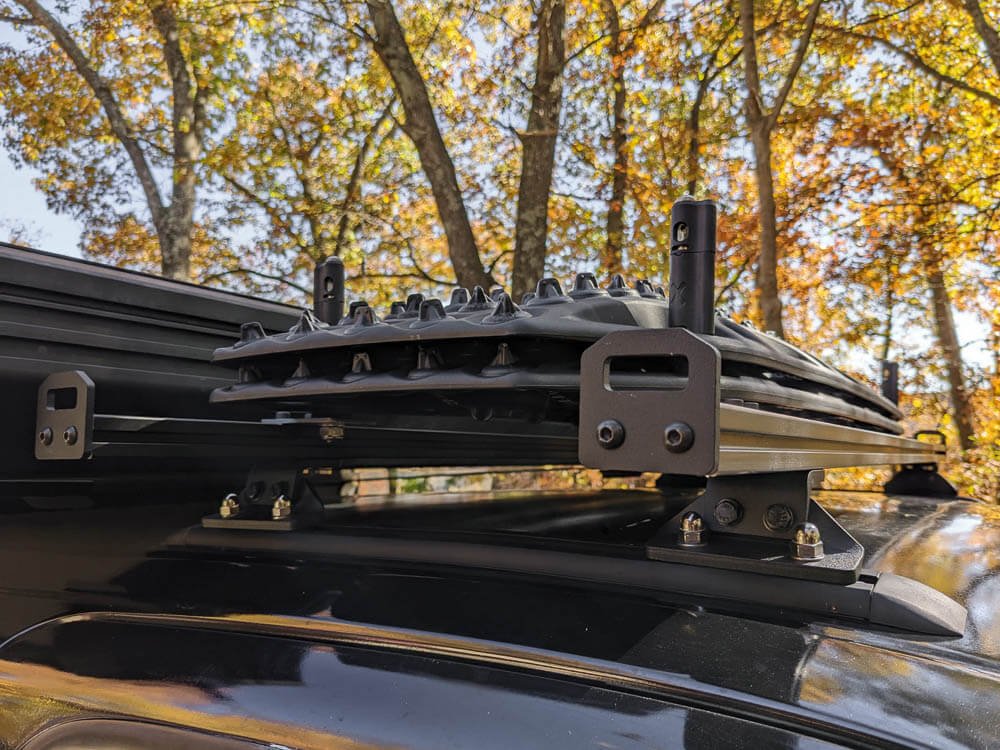
To complete the roof rack installation we used some M8 T-track studs*, to mount a pair of Sherpa Equipment Universal Load Bars. These high-quality, made in the USA, load bars are made with light-weight aluminum extrusions and components that offer plenty of ways to securely mount and store a variety of gear and equipment.
We opted to use the new roof rack to store a set of Maxtrax Xtreme* recovery boards using some simple DIY traction board mounts we made out of 1/4” aluminum flat stock and the Maxtrax mounting pins* (which allow them to be securely padlocked to the roof rack).
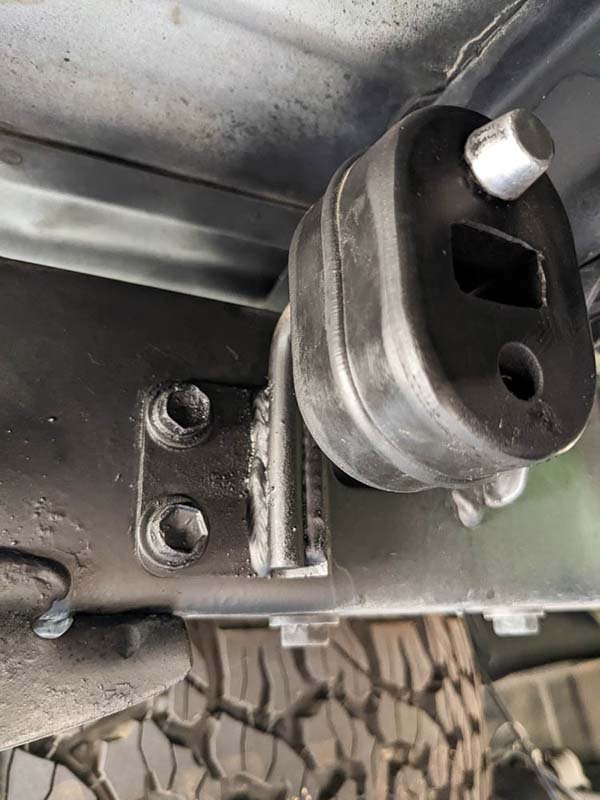
Total Chaos Tacoma Uniball Lower Ball Joint Conversion
The lower ball joint (LBJ) on the First Gen Tacoma is a known weak point on these otherwise stellar overland trucks.
The factory design places excessive shear force on the ball joint, ball joint stud, and the ball joint retaining bolts. Under harsh off-roading conditions, or if the lower ball joint is not replaced at frequent enough intervals, it can fail by either the ball separating from the cup, the stud breaking from the ball, or the retaining bolts loosening and breaking.
Depending on the situation in which the lower ball joint fails, this could be catastrophic, as the wheel and spindle assembly can fold underneath the vehicle or depart the vehicle entirely. No bueno…
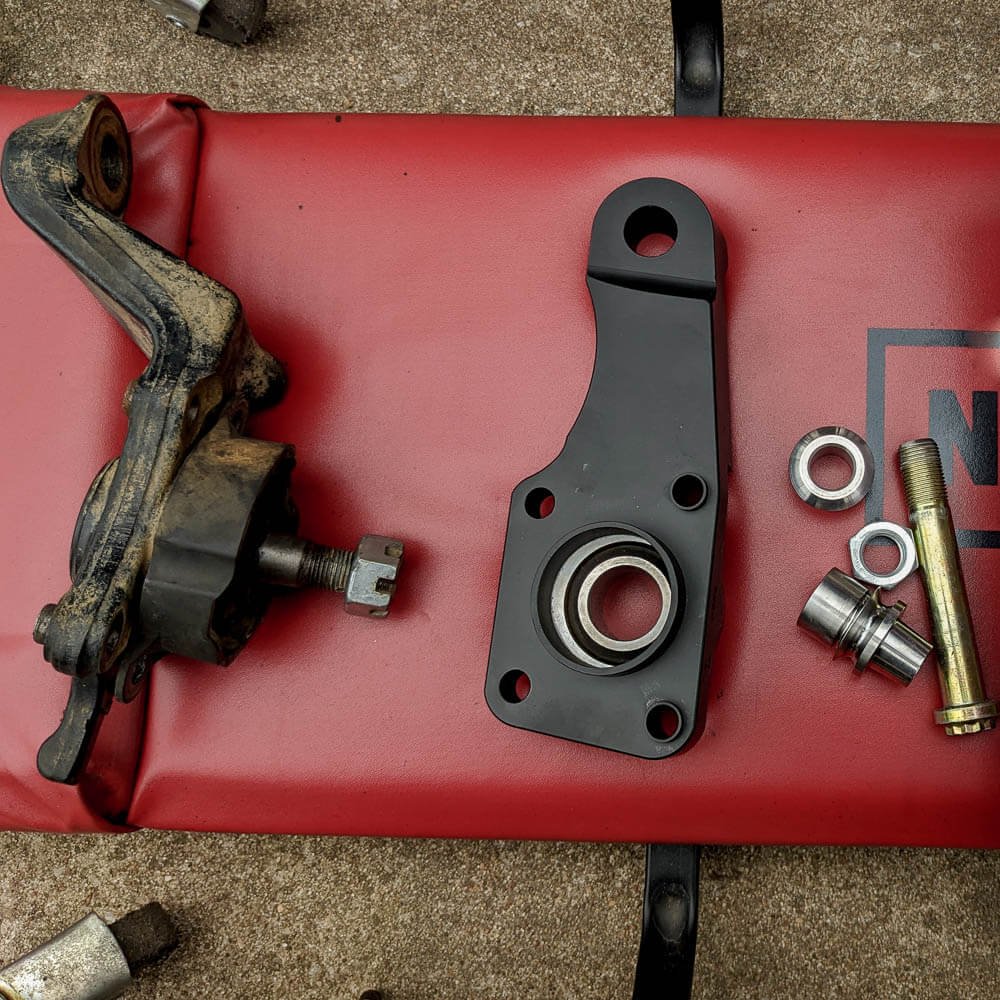
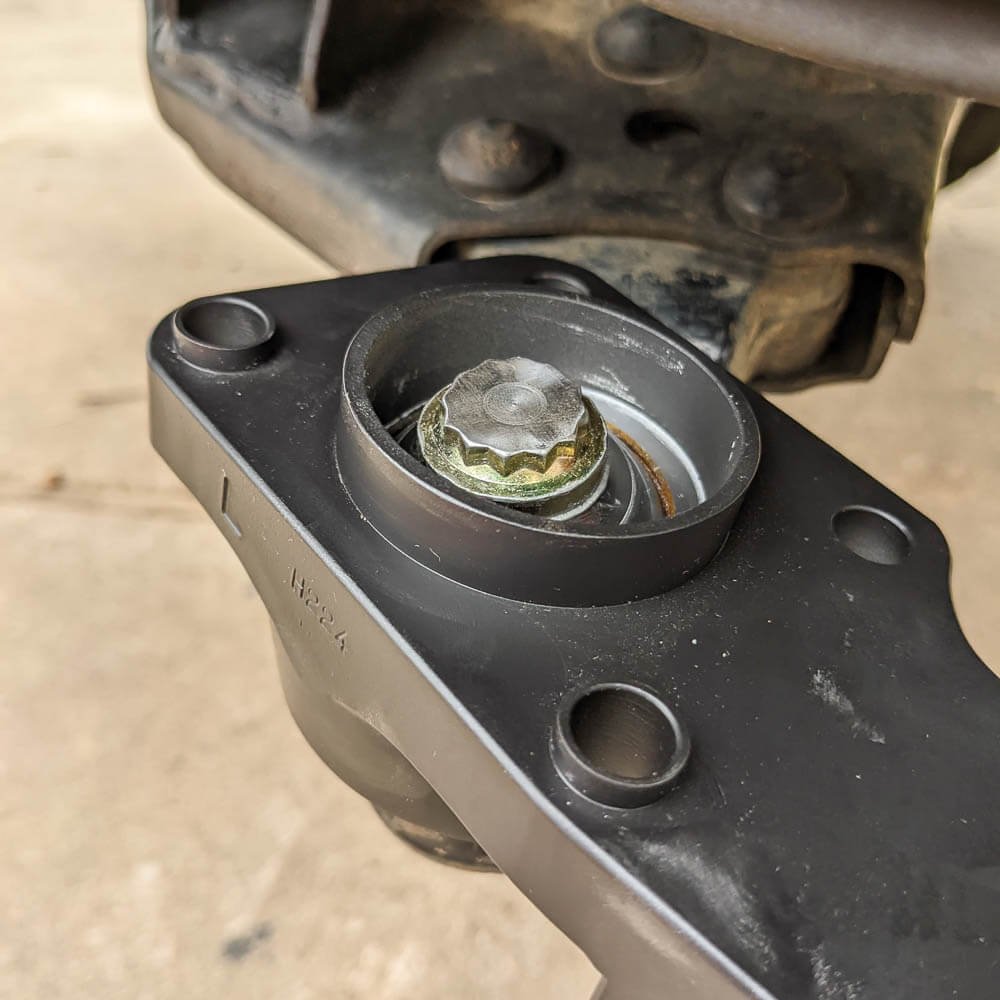
To resolve this issue, Total Chaos came out with a completely redesigned Uniball lower ball joint conversion and we decided the piece of mind was worth the investment. For a more in-depth overview of the issue and the fix check out our post all about the Total Chaos Uniball Lower Ball Joint Conversion.
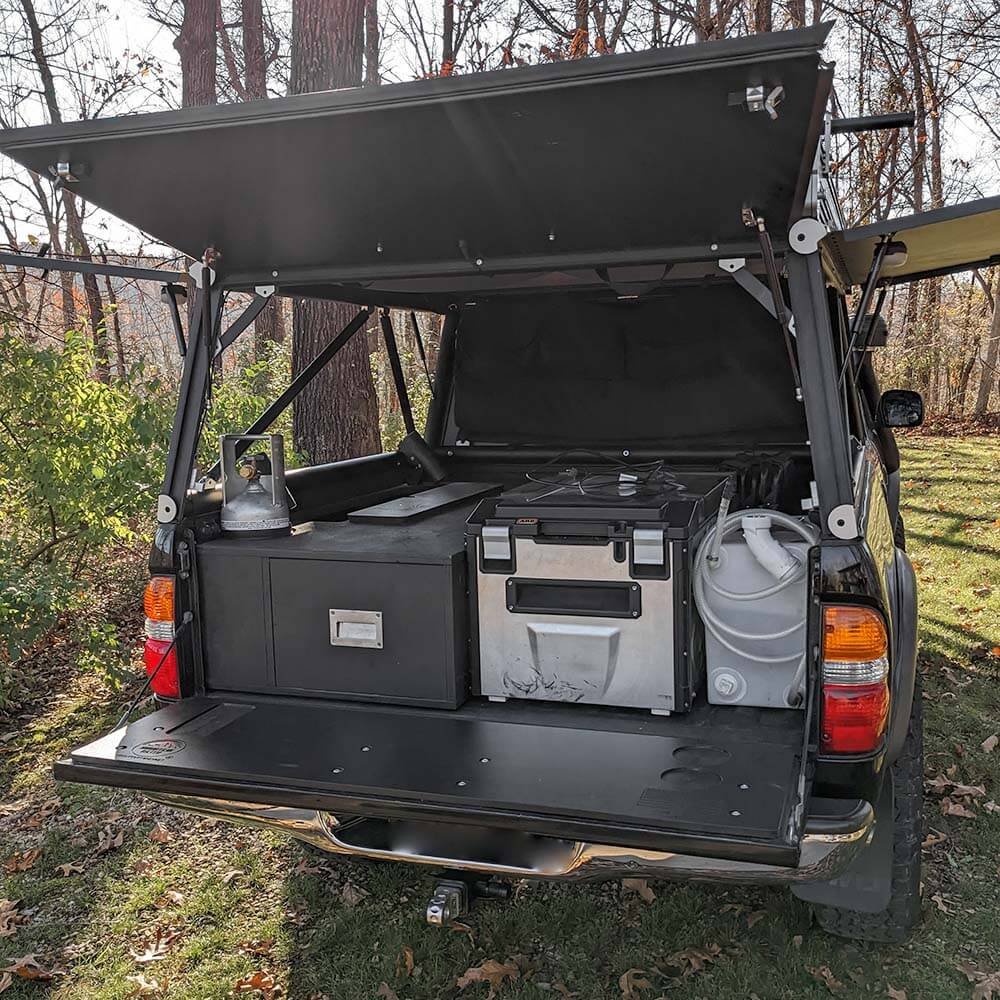
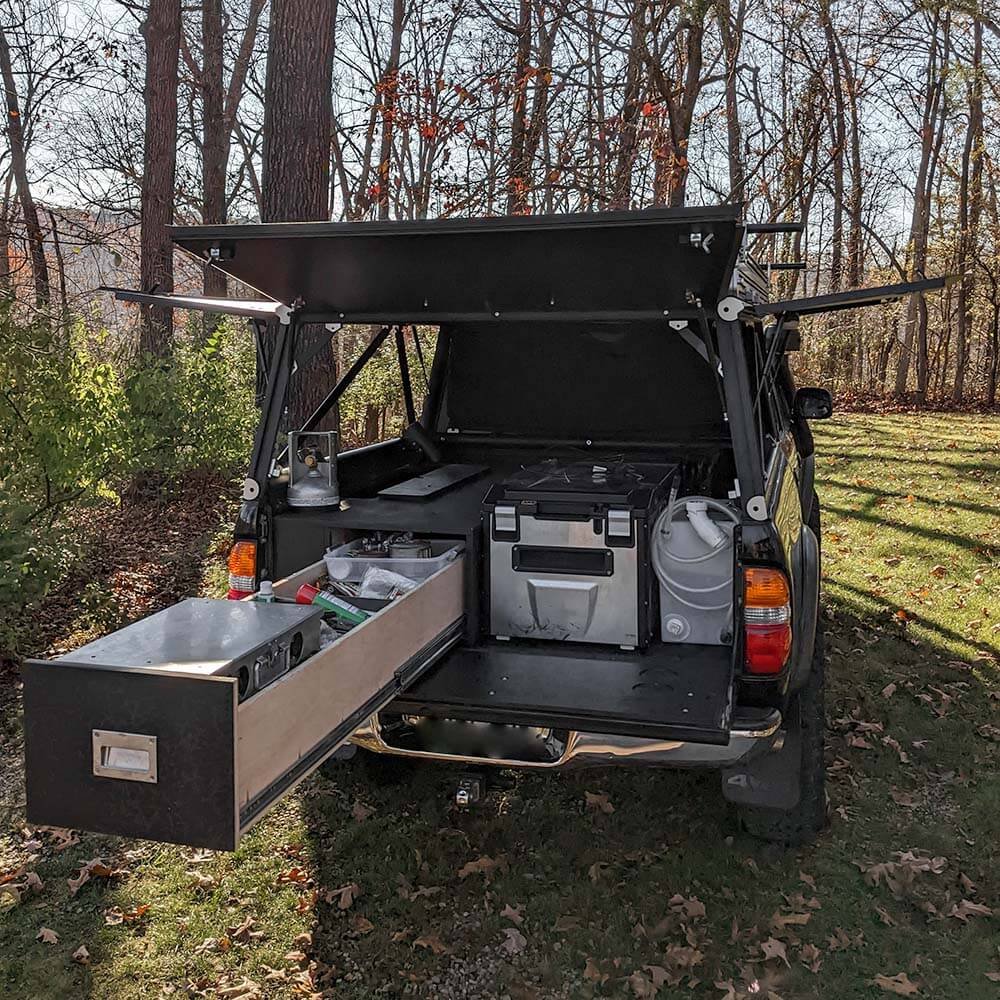
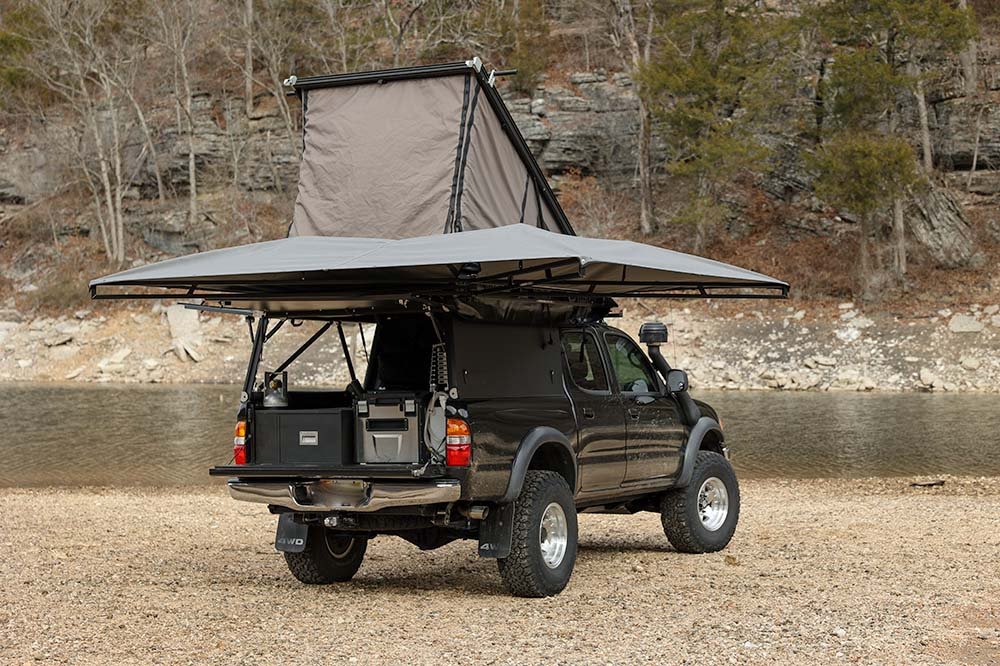
Tacoma Sleeping Platform Build With Drawer Storage
Building a sleeping platform and drawer storage for your Tacoma adds a ton of functionality; it helps keep things organized while traveling and adds extra sleeping quarters in the truck’s bed. You can check out the detailed build guide for our Tacoma Truck Camping Setup with a half-platform that includes a full 60in drawer, tons of storage, while still leaving room for our ARB Elements Fridge, 10 gallon DIY Camping Shower and Water Container, and all of our other overland camping gear.
Tacoma Overland Awning Install
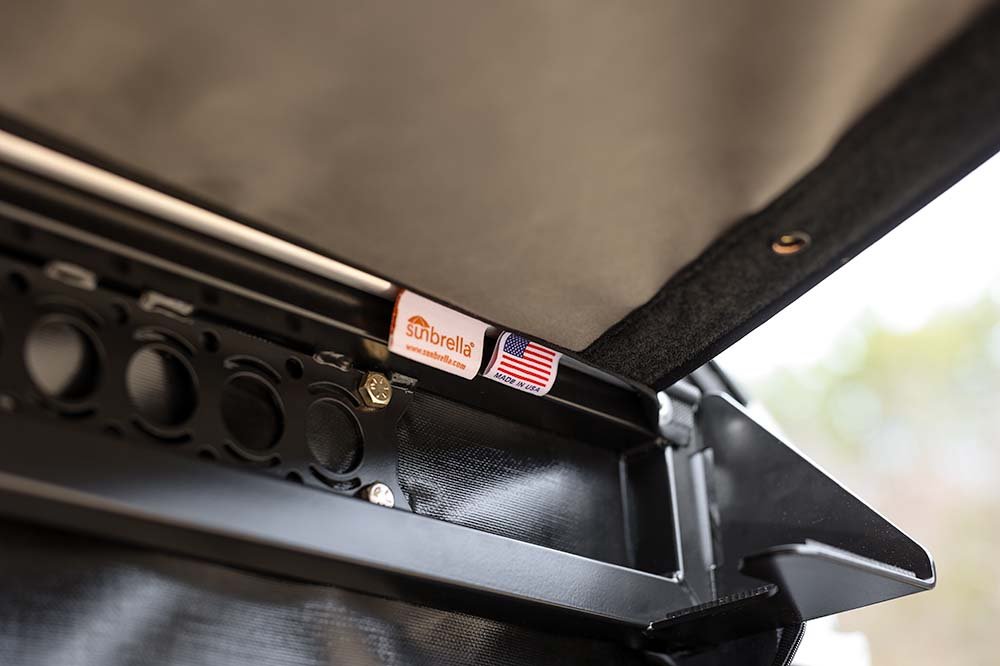
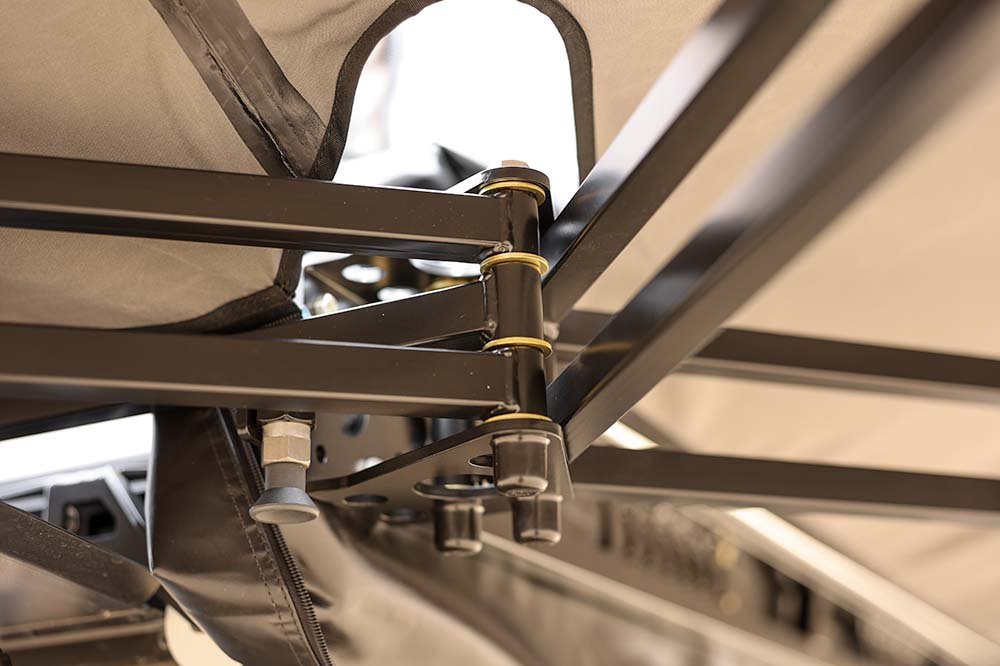
An awning can be a real gamechanger when you’re camping and traveling, providing a sheltered space to escape the sun or inclement weather and expanding your living space while overlanding. We’d had our eyes on the Kinsmen Hardware awning for years, and after considering a variety of The Best Overland Awnings on the market, carefully weighing the pros and cons each, we decided to invest in the Kinsmen 270 Awning for our Tacoma overland build. And quite frankly we could not be happier, it’s quite possibly The Best 4x4 Awning ever made.
Video Walk-Through of the Tacoma Overland Build
We put together a detailed walk-through of our Tacoma overland build up to this point, and you can check it out below:
TUNE Outdoor M1 Truck Camper Install and Build Out
After our son was born we took a multi-week trip out west and it became apparent that, while we loved the GFC camper, we'd need a bit more room if we intended to be on the road longer than a couple weeks at a time. As fate would have it on that same trip we ran into a couple in Southeast Utah that had just had a new Tune M1 camper installed and we fell in love with the unique cantilever design that provides a massive amount of interior space at a very reasonable weight penalty (at 360lbs for a model for our Tacoma's 5ft bed it's only about 80lbs heavier than our old GFC).
So when we got home we put down a deposit, and had an install scheduled only a couple months later. We opted for the king-size bed extension which gives the camper a massive 72" x 80" east-west sleeping platform while still maintaining 34" of passthrough to the truck bed. Now all four of us can sleep comfortably up top east west or north south and the entirety of the Tacoma’s bed can be used for gear storage and interior hangout space in inclement weather if needed. You can check out our in-depth initial review of the Tune M1 for more details.
Once the Tune M1 was installed on the Tacoma, it was time to start building out the camper (again 😅)!
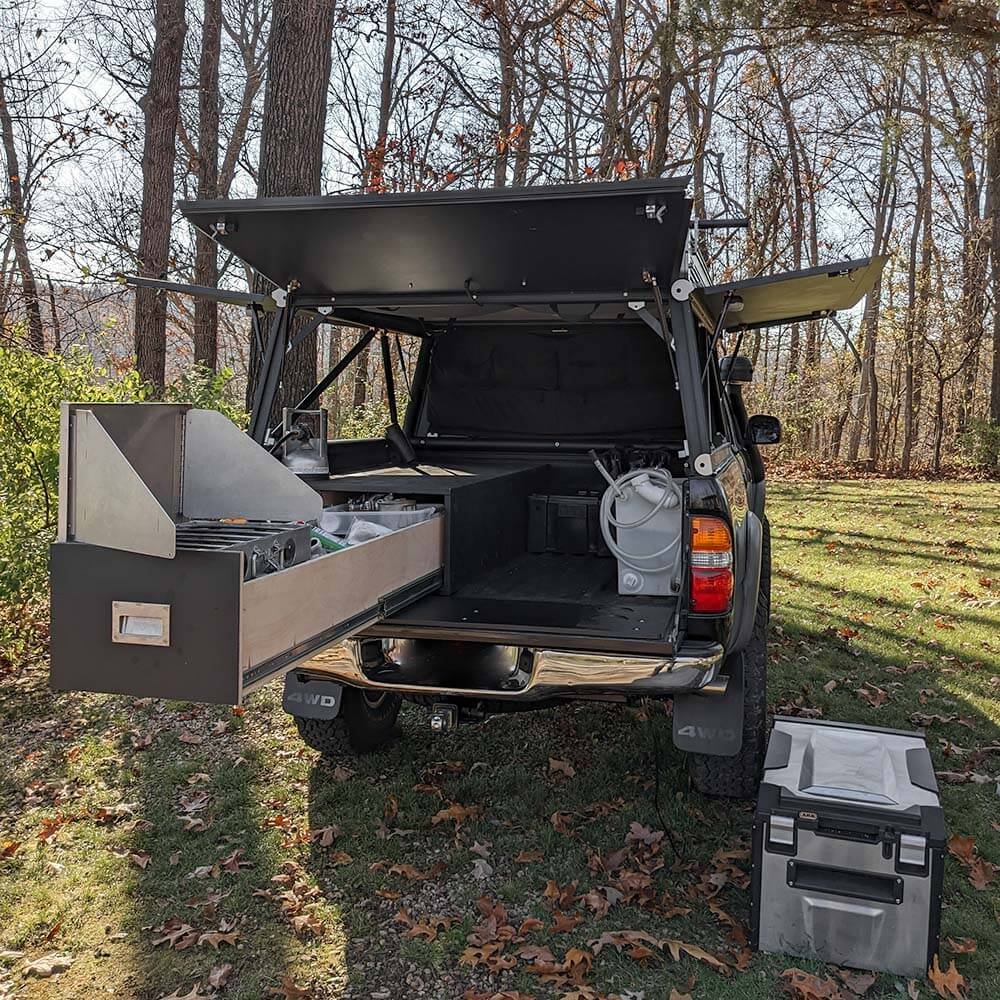
8020 Aluminum Extrusion Overland Sleeping Platform with Drawer Storage

In an effort to further reduce the Tacoma’s total build weight (a constant challenge for any Tacoma overland build due to their limited GVWR), we decided to rebuild our existing Tacoma sleeping platform/drawer storage out of 8020 aluminum extrusions. This reduced the platform’s weight by 39% and we were really happy with the finished product, complete with a 58" drawer and hydraulic assisted Partner Steel Stove lift 🤓.
You can check out our detailed 8020 drawer platform build guide here, incase you are interested in building a similar 8020 aluminum drawer platform in your own overland Tacoma build.
Propane Heater Install

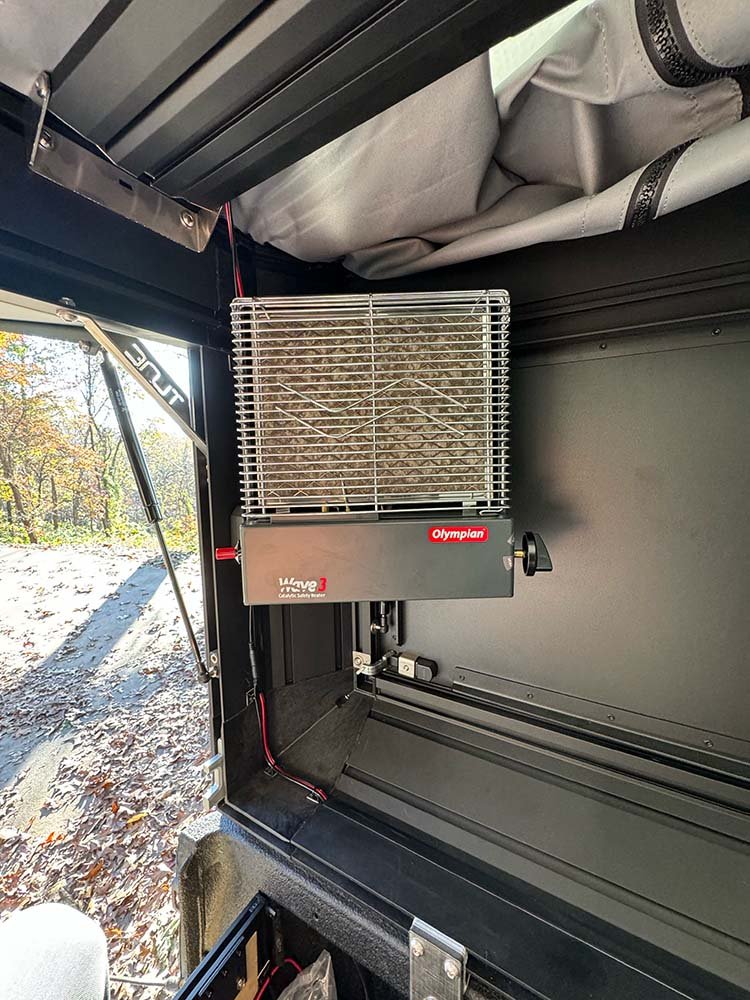
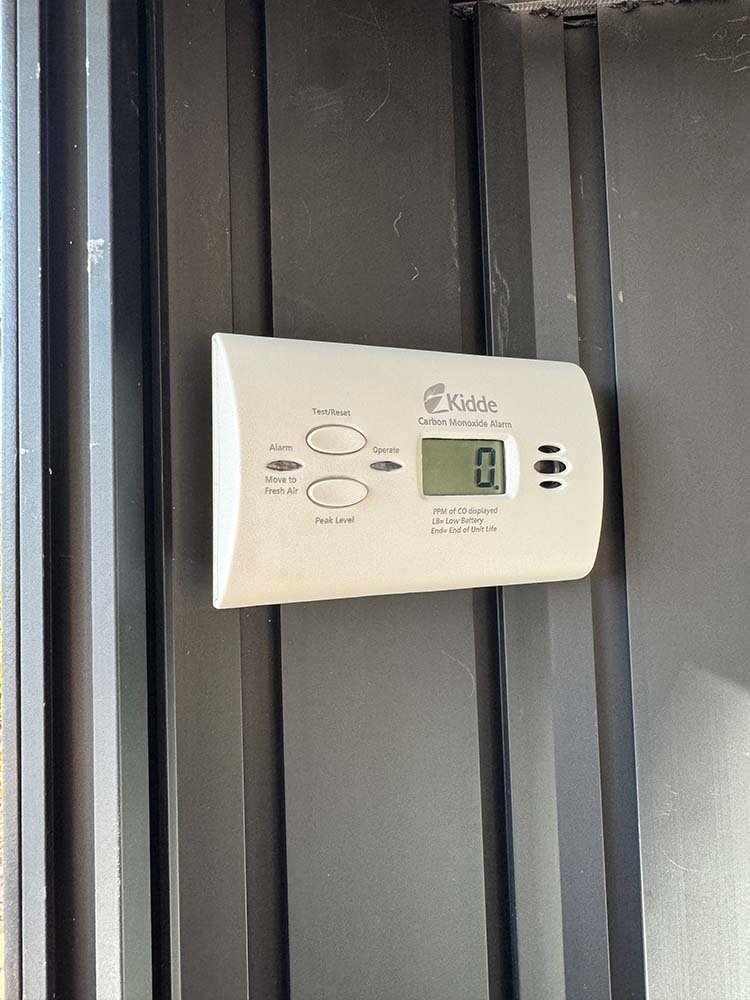
There are lots of ways to stay warm while cold weather camping, and lots of truck camping heaters on the market. We ultimately landed on the Olympian Wave 3 for our overland Tacoma build, and came up with a slick removable mounting solution for for the Tune M1 Camper (as well as the requisite CO detector) using the Tune M1's integrated T-track (the camper has something like 450ft of T-track built in which makes customizing SUPER easy) and a cheap TV mount*. This allows us to quickly and easily remove the heater and store it in the storage platform when it’s not needed.
Truck Bed L-Track Installation

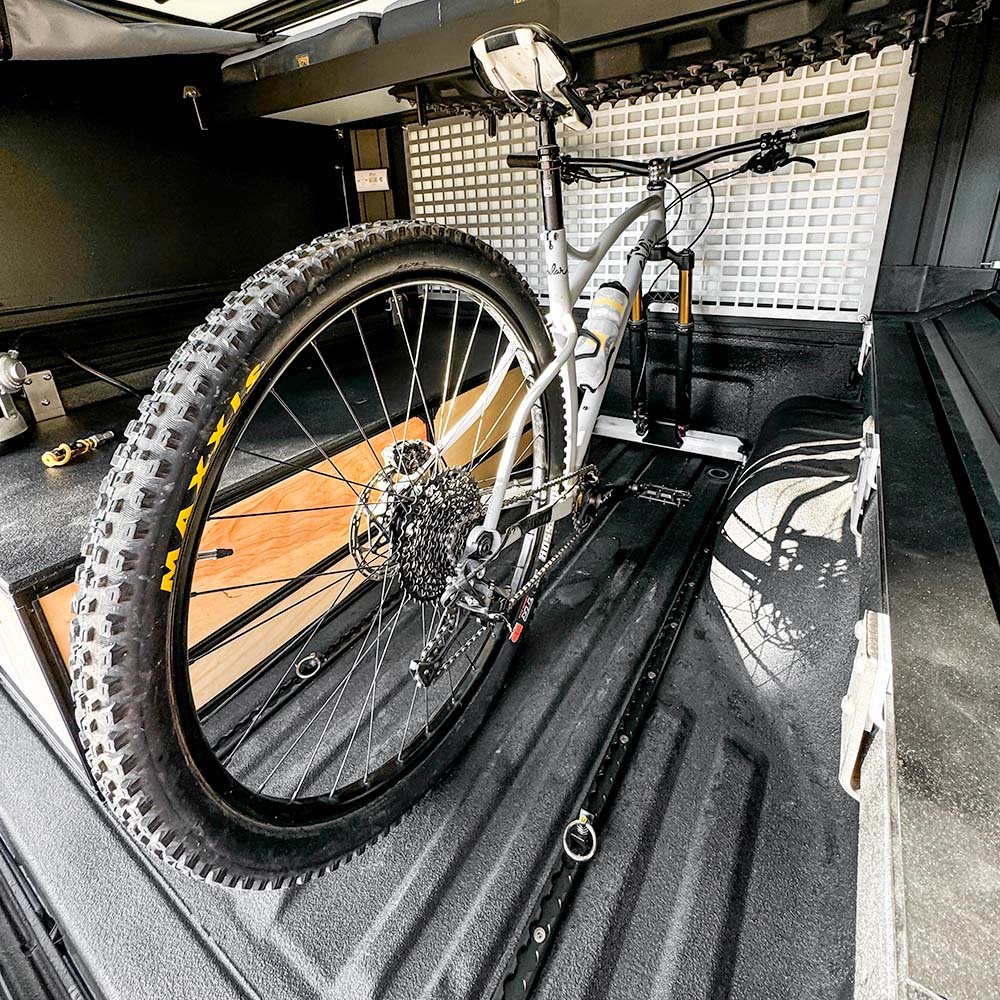
L-track can add a ton of utility to any Toyota tacoma overland build. We installed our L-track in the truck’s bed using stainless steel rivnuts, and primarily use it for securing our ARB fridge and front runner boxes while traveling. We also came up with a slick removable DIY truck bed bike rack for hauling our mountain bikes too.
Regearing the Tacoma’s Differentials and Adding a Front Diff Locker

Anytime you add significant weight (overlanding and truck camping gear), wind resistance (a truck camper), or increase tire size it is a good idea to regear your truck’s differentials to help take stress of the engine and transmission.
While the new Tune M1 camper didn’t add significantly more weight than our old GFC, it did add a good deal more wind resistance. I had been putting off regearing from the Tacoma’s stock 4.10 geared differentials, but it was time. So we ordered a set of built 4.88 differentials from East Coast Gear Supply. The install went as smooth as one could hope and I replaced the (original) rear wheel bearings and brakes while I hade the axles tore apart.
Differential lockers are an invaluable tool for driving off road; a diff locker provides increased traction control by “locking” the two axle shafts, in either the front or rear axle, together sending equal power to each wheel in loose terrain. Our Tacoma came with a rear electronic locking differential, but while we were tearing apart the axles to regear it was a good time to add an ARB air locker to the front axle.
Now in 4WD, all four wheels can receive equal power for maximum traction off road.
TO BE CONTINUED…
Any great overland build is continually evolving to better suit your needs and adventures; we’ll routinely update this post as we continue our Toyota Tacoma overland truck build in hopes that this detailed overview of our build process can be a helpful insight or reference for your own overland truck build as well.
If you have any questions (or suggestions!) about our overland truck build, drop a comment down below.
Be sure to SUBSCRIBE for more helpful camping, overlanding, or family travel tips and guides.
And as always, thanks for reading!
Related Posts:
Save a Pin to Pinterest!

We’d Appreciate a Share!